DIY ~ A Homemade Floor to Ceiling Desk and Shelf Unit with a 70's Vibe.
Every since I saw the house on Rightmove I’ve been trying to make a decision what to do with the wall behind my sofa - it had such promise as a space and I knew I wanted to make the most out of it than I could. And I also knew I wanted it to have a retro, 70’s vibe - making it warm and unique.
I originally planned to have a bookcase wall and had thought about how I would approach it lots - there were loads of images saved to my living room Pinterest board but something in the back of my mind wasn't fully into the trend of the built in bookcases I had seen.
But then a few years went by and my Kallax sat there wholly unorganised and every time I walked by I thought ‘I must get to that wall’. In autumn of last year I moved out of my studio and because Monty was older and struggled to get up and down the stairs I figured if I’m working from home I’d want to make the most of the time with him so I set about planning how to make that wall a desk wall AND bookshelves. I’d tried working in my spare room before and didn’t love being disconnected from the rest of the house and also felt conscious when guests came they would have to sleep among all my work things.
Money was very tight last year so I also needed a way of building it that was cost effective AND had longevity and functionality. So I sold my desk from the studio to fund the wood and got planning and building.
Eventually I will extend the unit out across the whole wall so it is built around the door. In the end it was pretty easy to do so not dreading when the building of that comes around!
Choosing the wood.
One thing I knew was that I really didn't want to use MDF for two reasons - the first being that it’s highly toxic to work with, off gassing formaldehyde among other toxins, but the second being that I wanted a material that would look like wood when stained and that didn't go orange like pine. Plywood still isn’t toxin free but it is substantially less toxic to work with and have in your home that mdf.
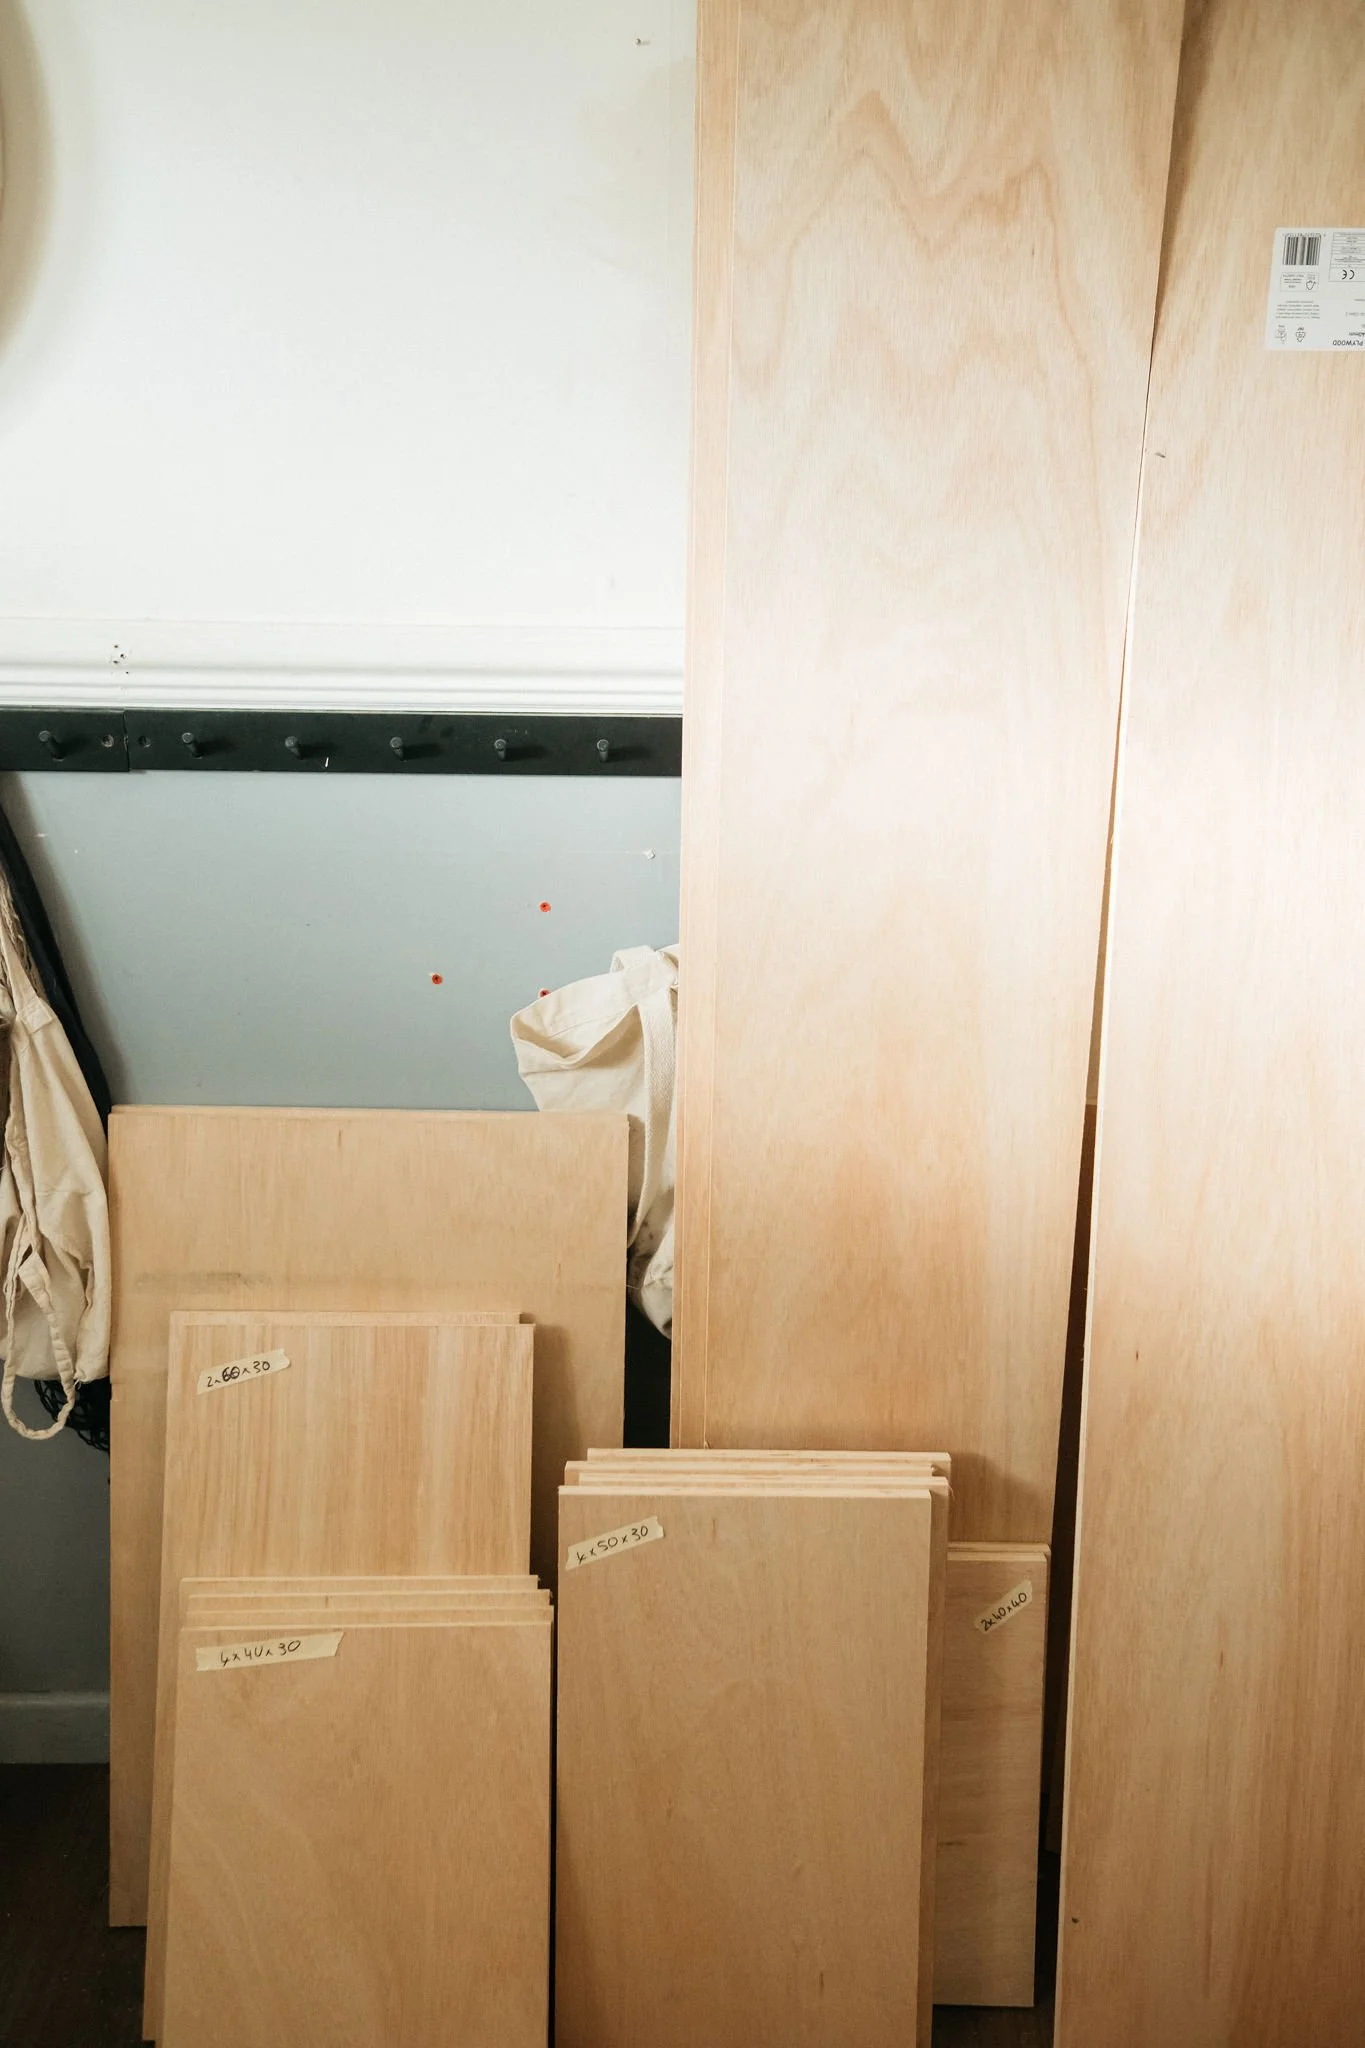
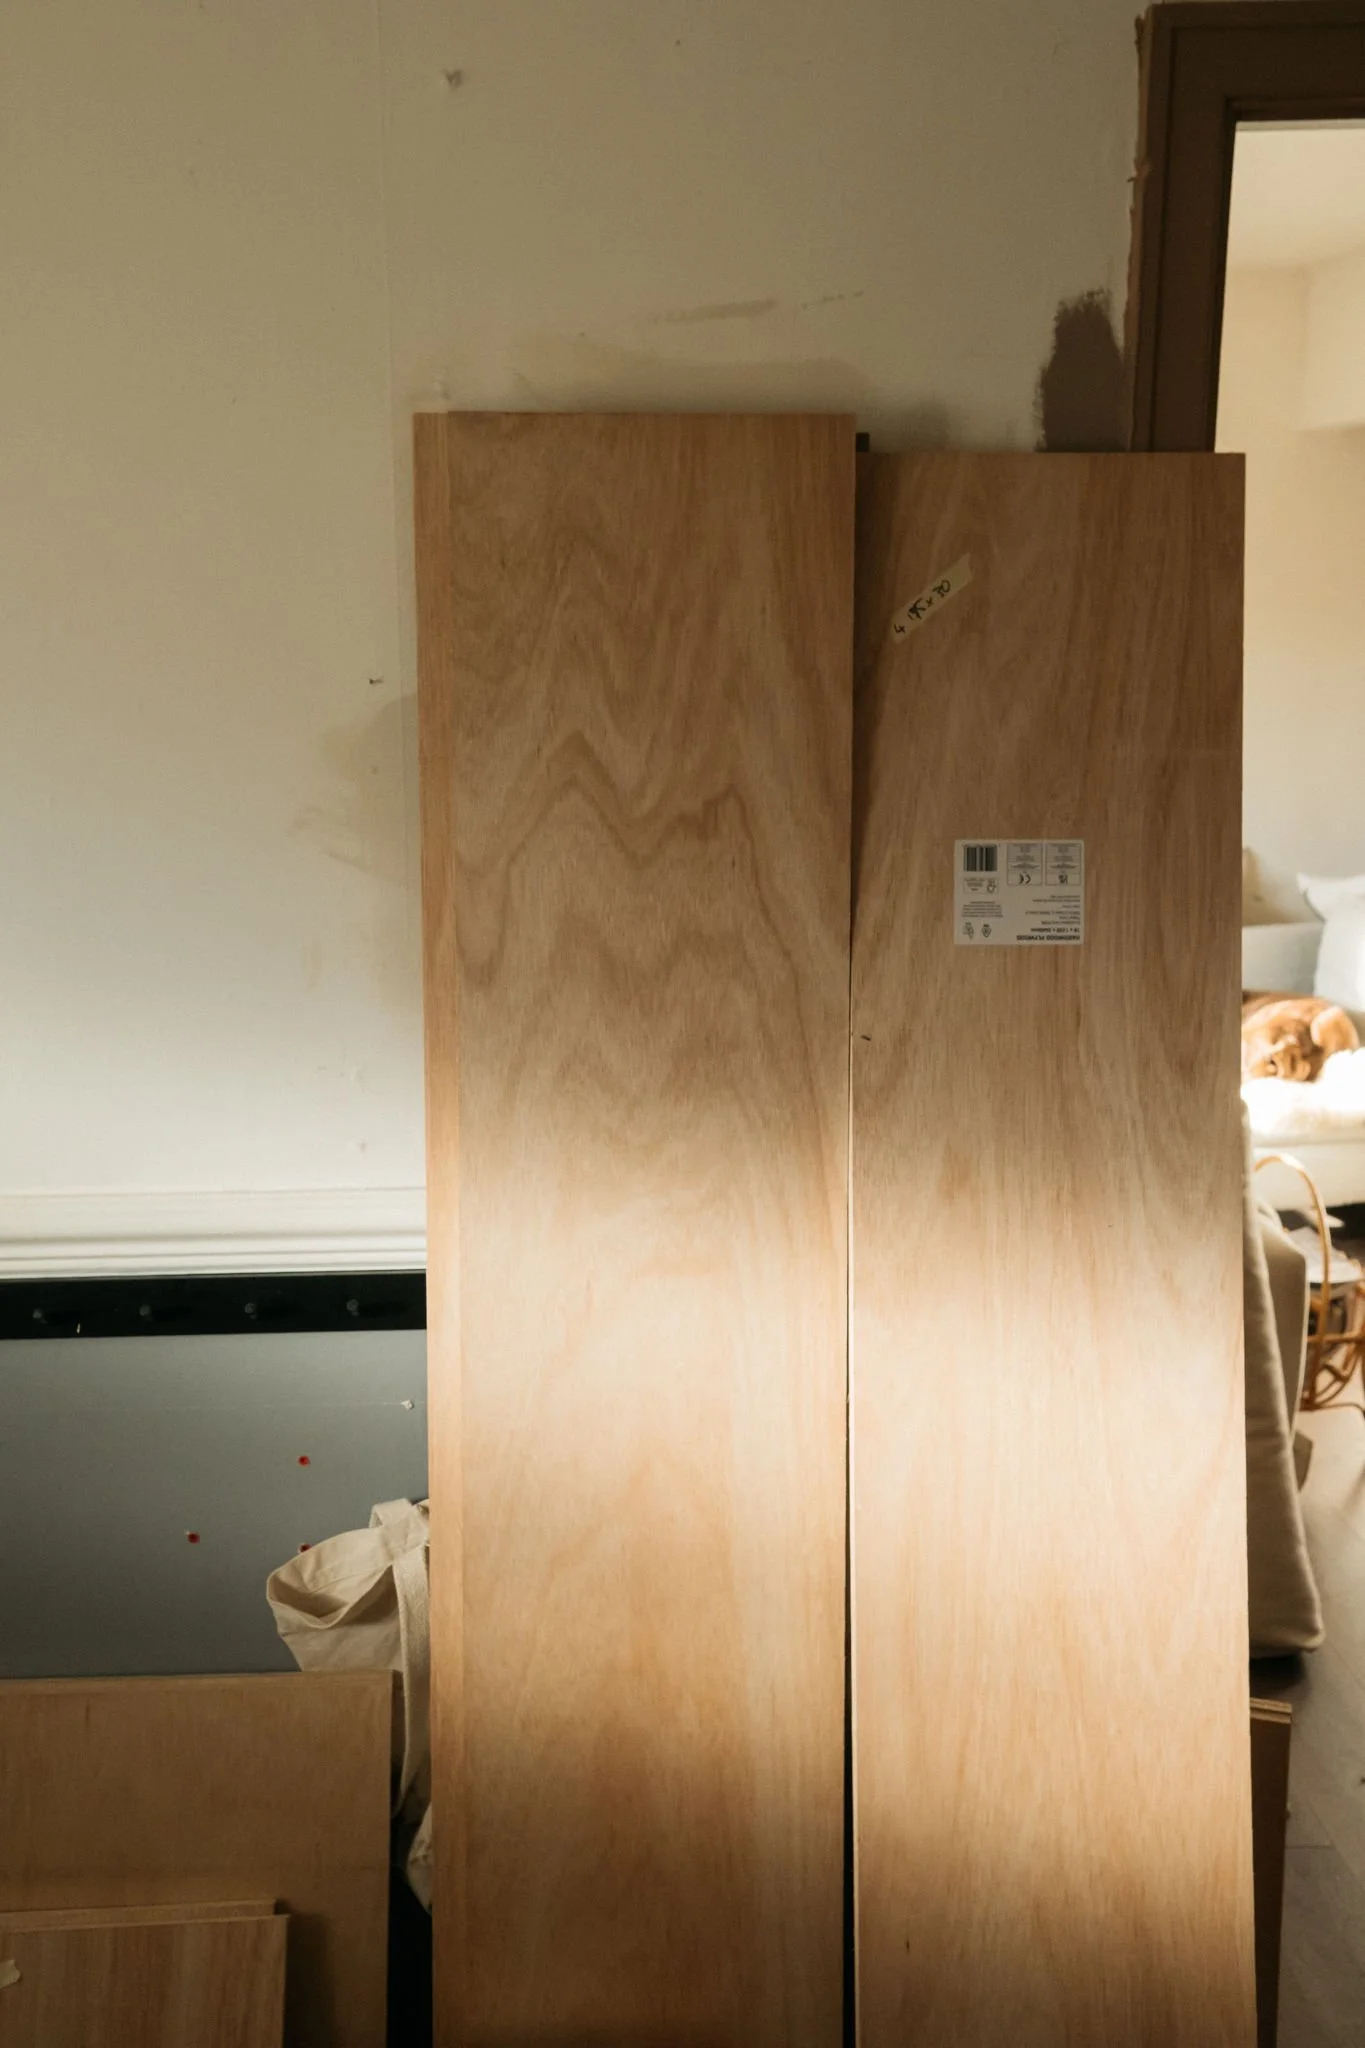
Additionally, I would need a lot of specifically sized bits of wood and I had worked with B&Q’s 18mm thick plywood before and knew that they can cut to specification.
Planning the desk.
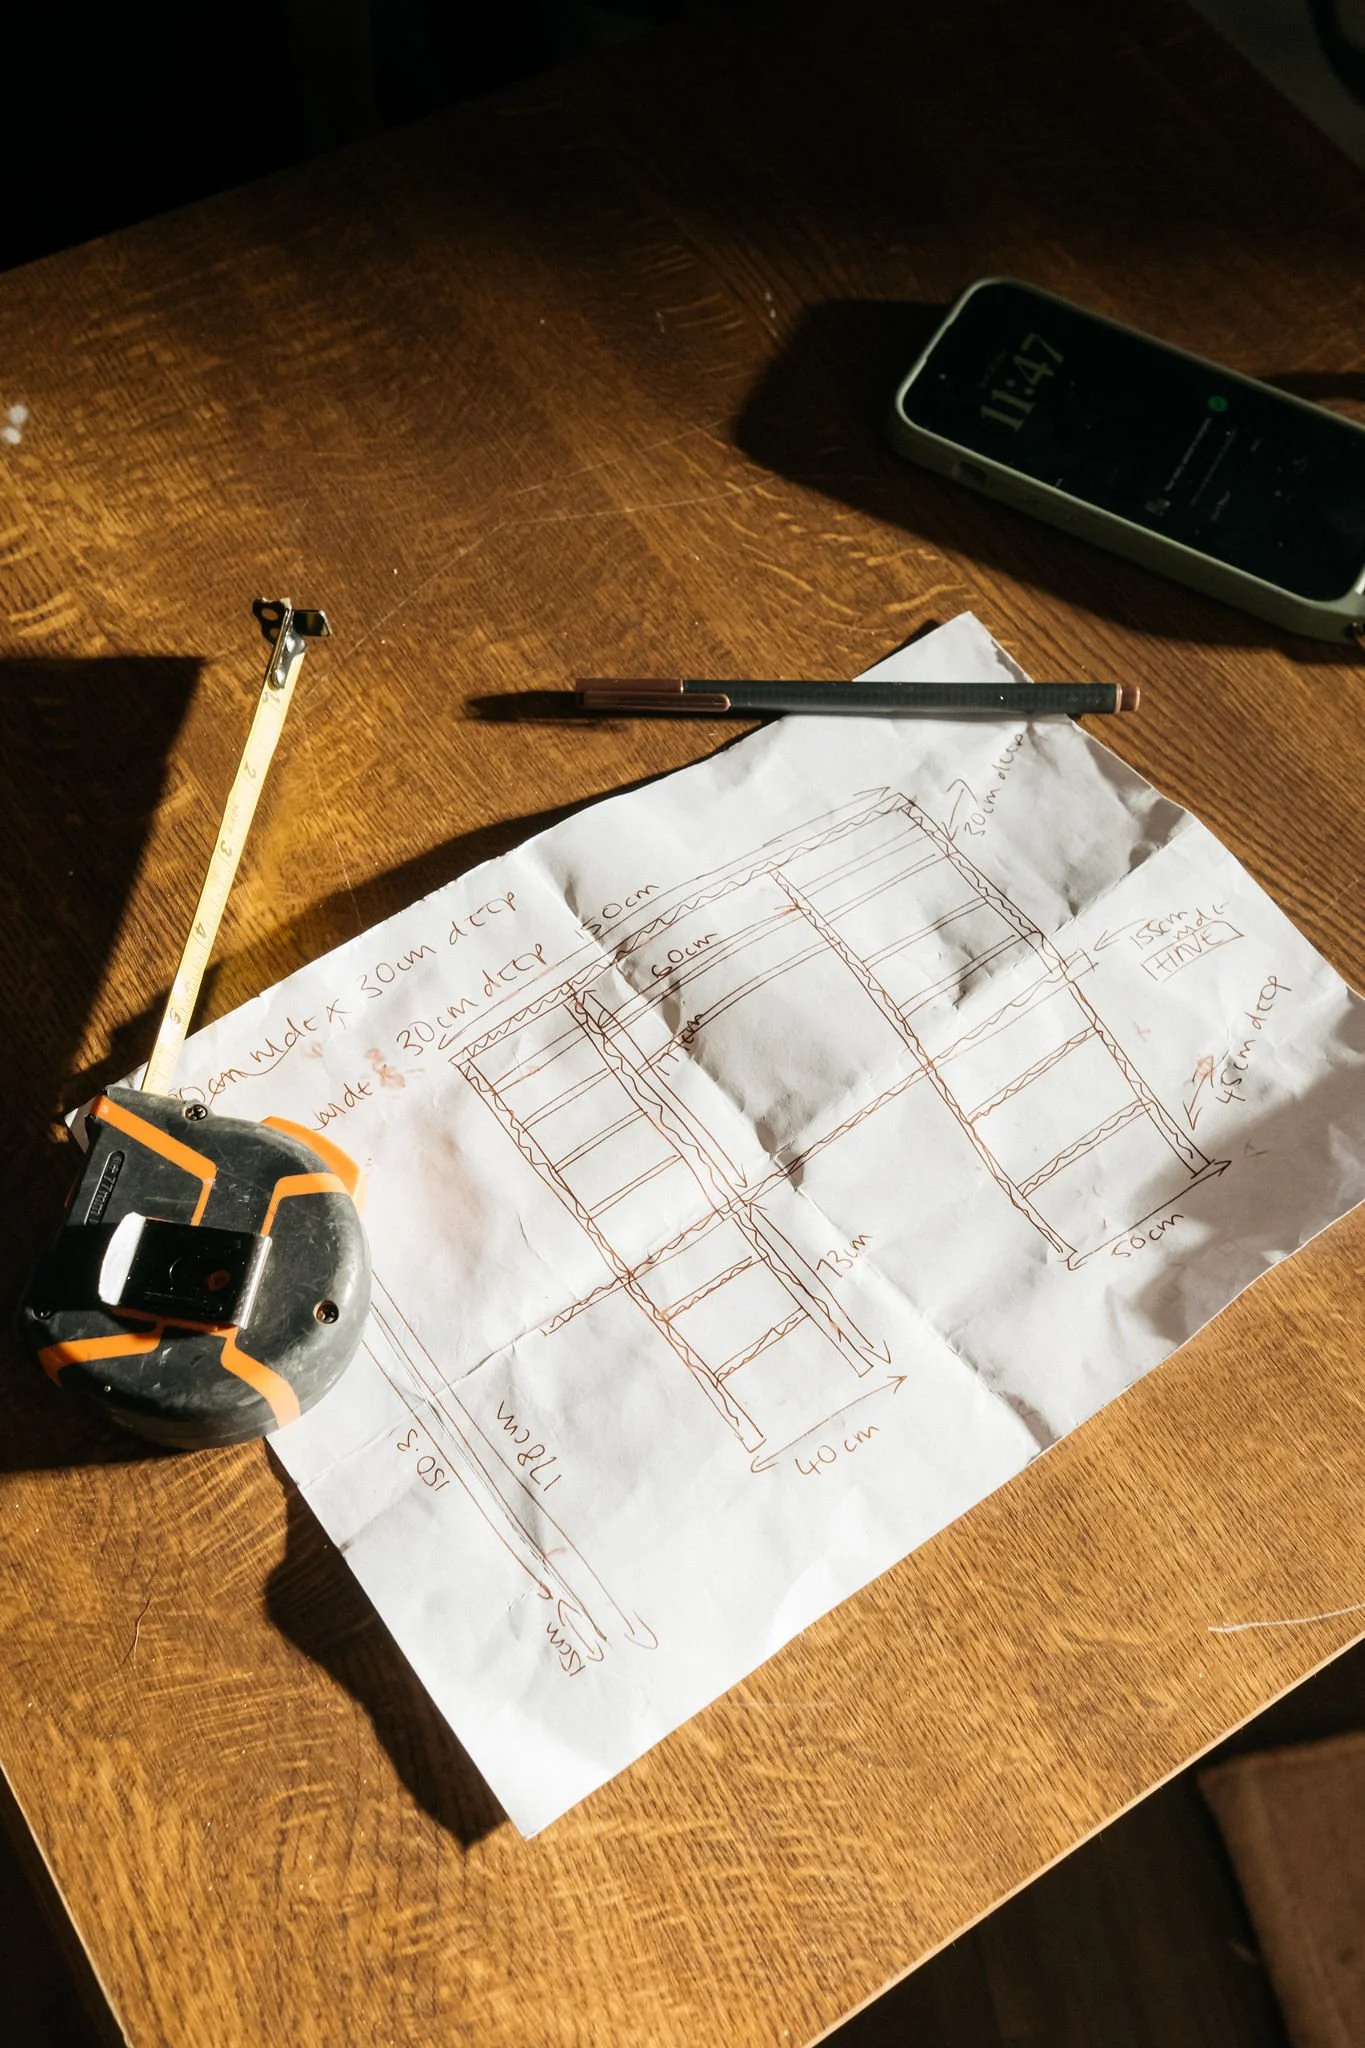
I sat with a very large cup of peppermint tea opposite the wall and sketched out how I would want to use the space on a large piece of paper. I also made a list of the things I would want to house (printer, magazine files, boxes, books etc) and using a pencil gave them a home on my sketch, moving things around as and when I needed to. I knew I also needed to house my laptop on a raised platform with something underneath to hide all the hard drives and cables I need access to.
I then got my tape measure out and measured all the bits. Word of warning - don’t just take one floor to ceiling measurement - turns out mine is shorter at one end of the wall which caused me problem later down the line. I then went to B&Q with my measurements and he got to work on the saw to cut all my bits - I think we ended up using two sheets of ply in the end.
Putting together.
This was actually way easier than I’d imagined. This 18mm plywood is pretty solid and strong so easy to work with and with the precision cuts putting it together was pretty stress free. I measured two pilot holes for where I was going to screw into the ends to attach to the long piece and then drilled with a 4mm wood drill bit. I also measured along the long vertical lengths where the screws would be going through and drilled the pilot holes in those two. So for each join I used two holes and screws and then also squeezed some wood glue along the join.
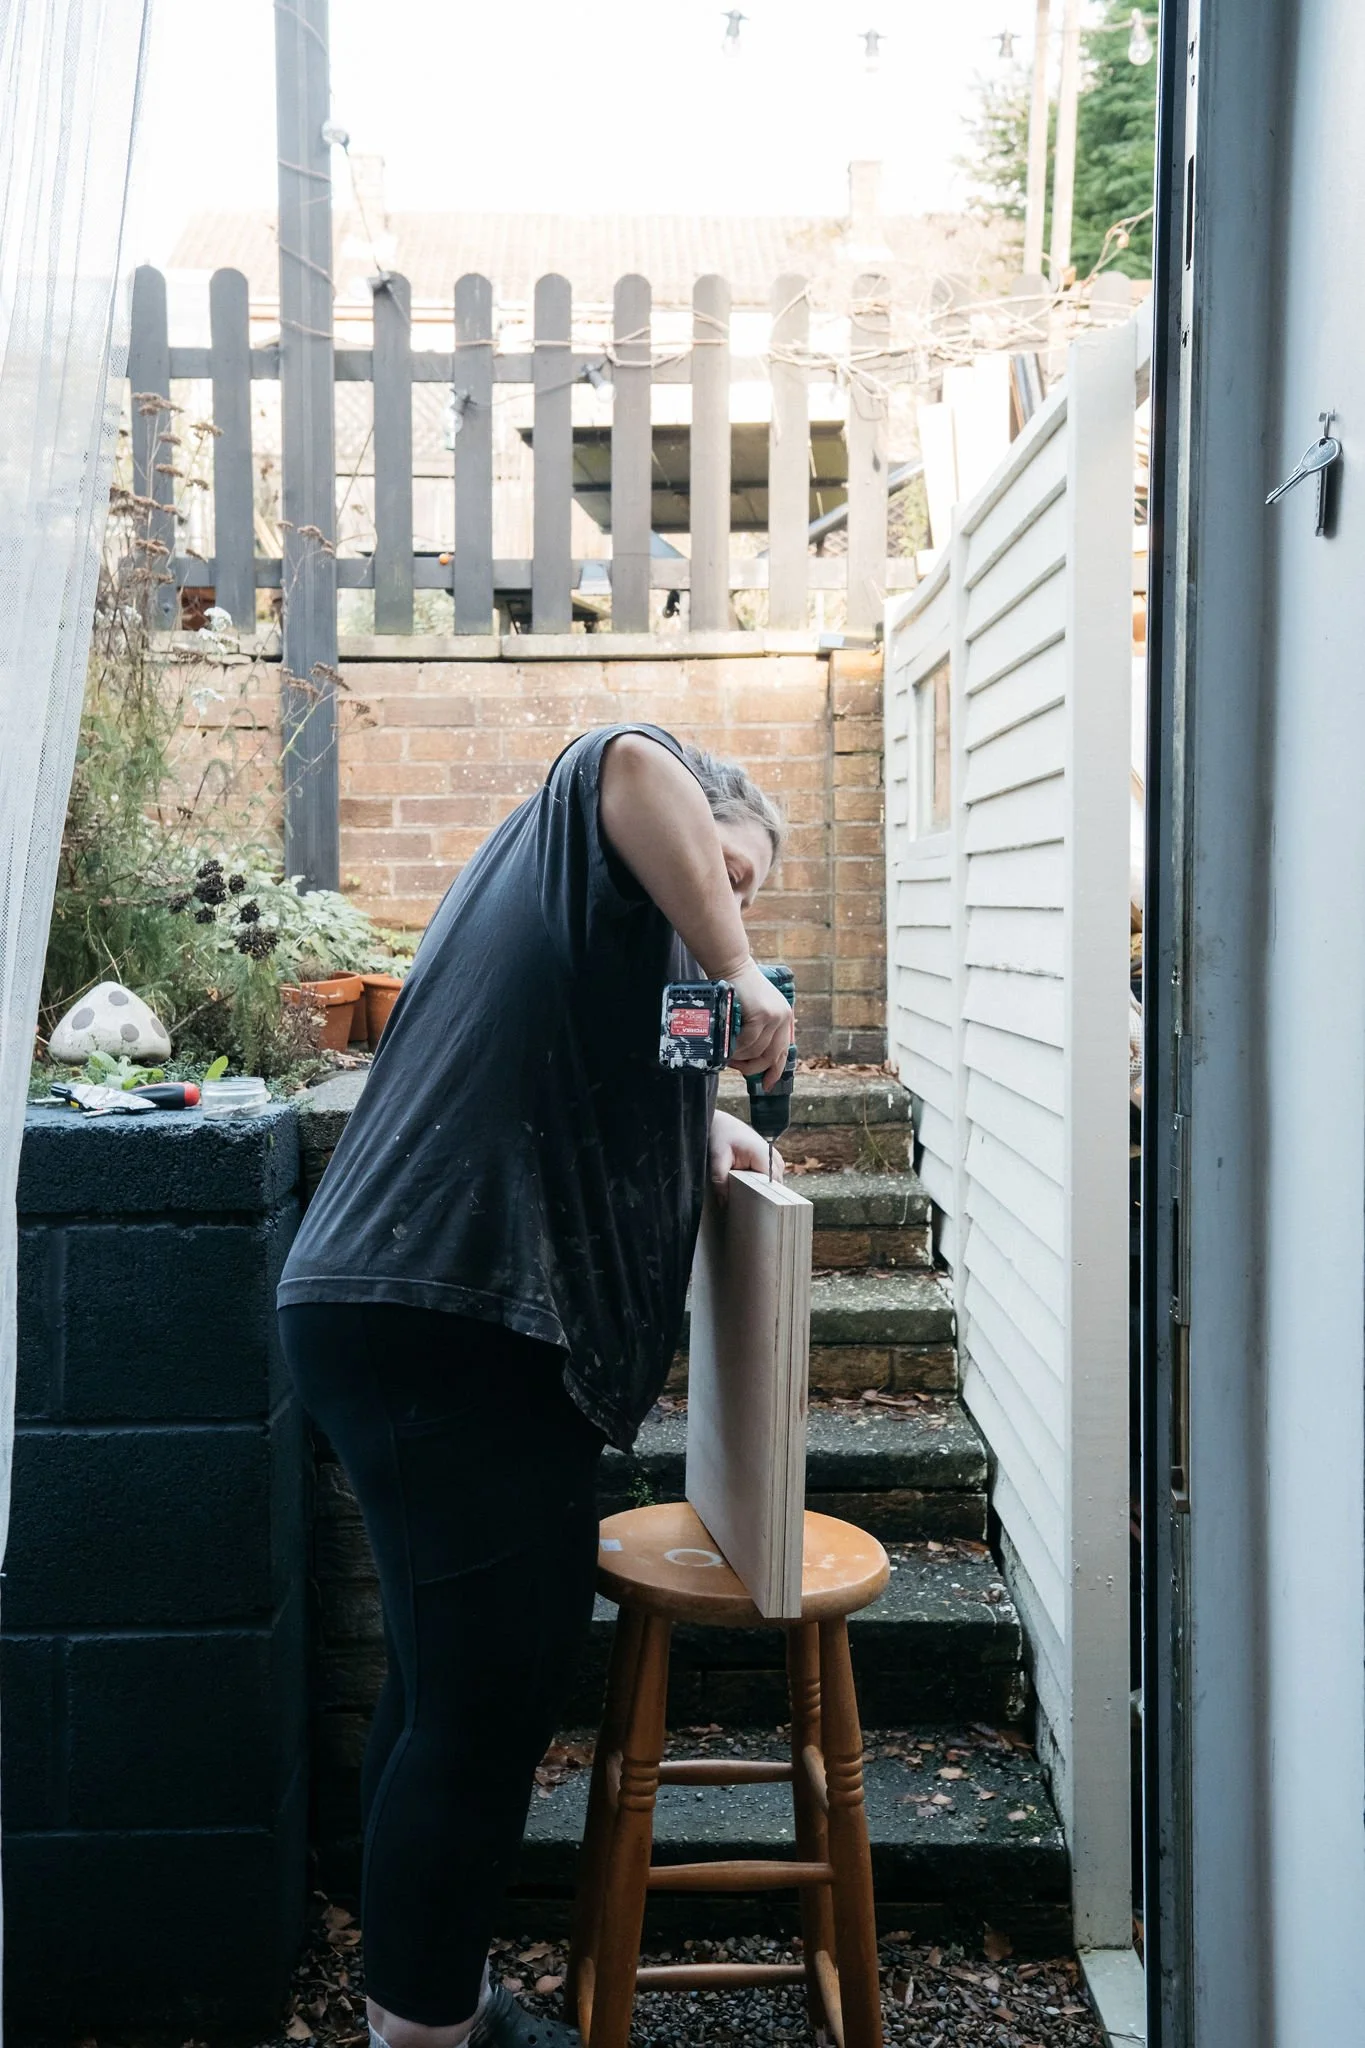
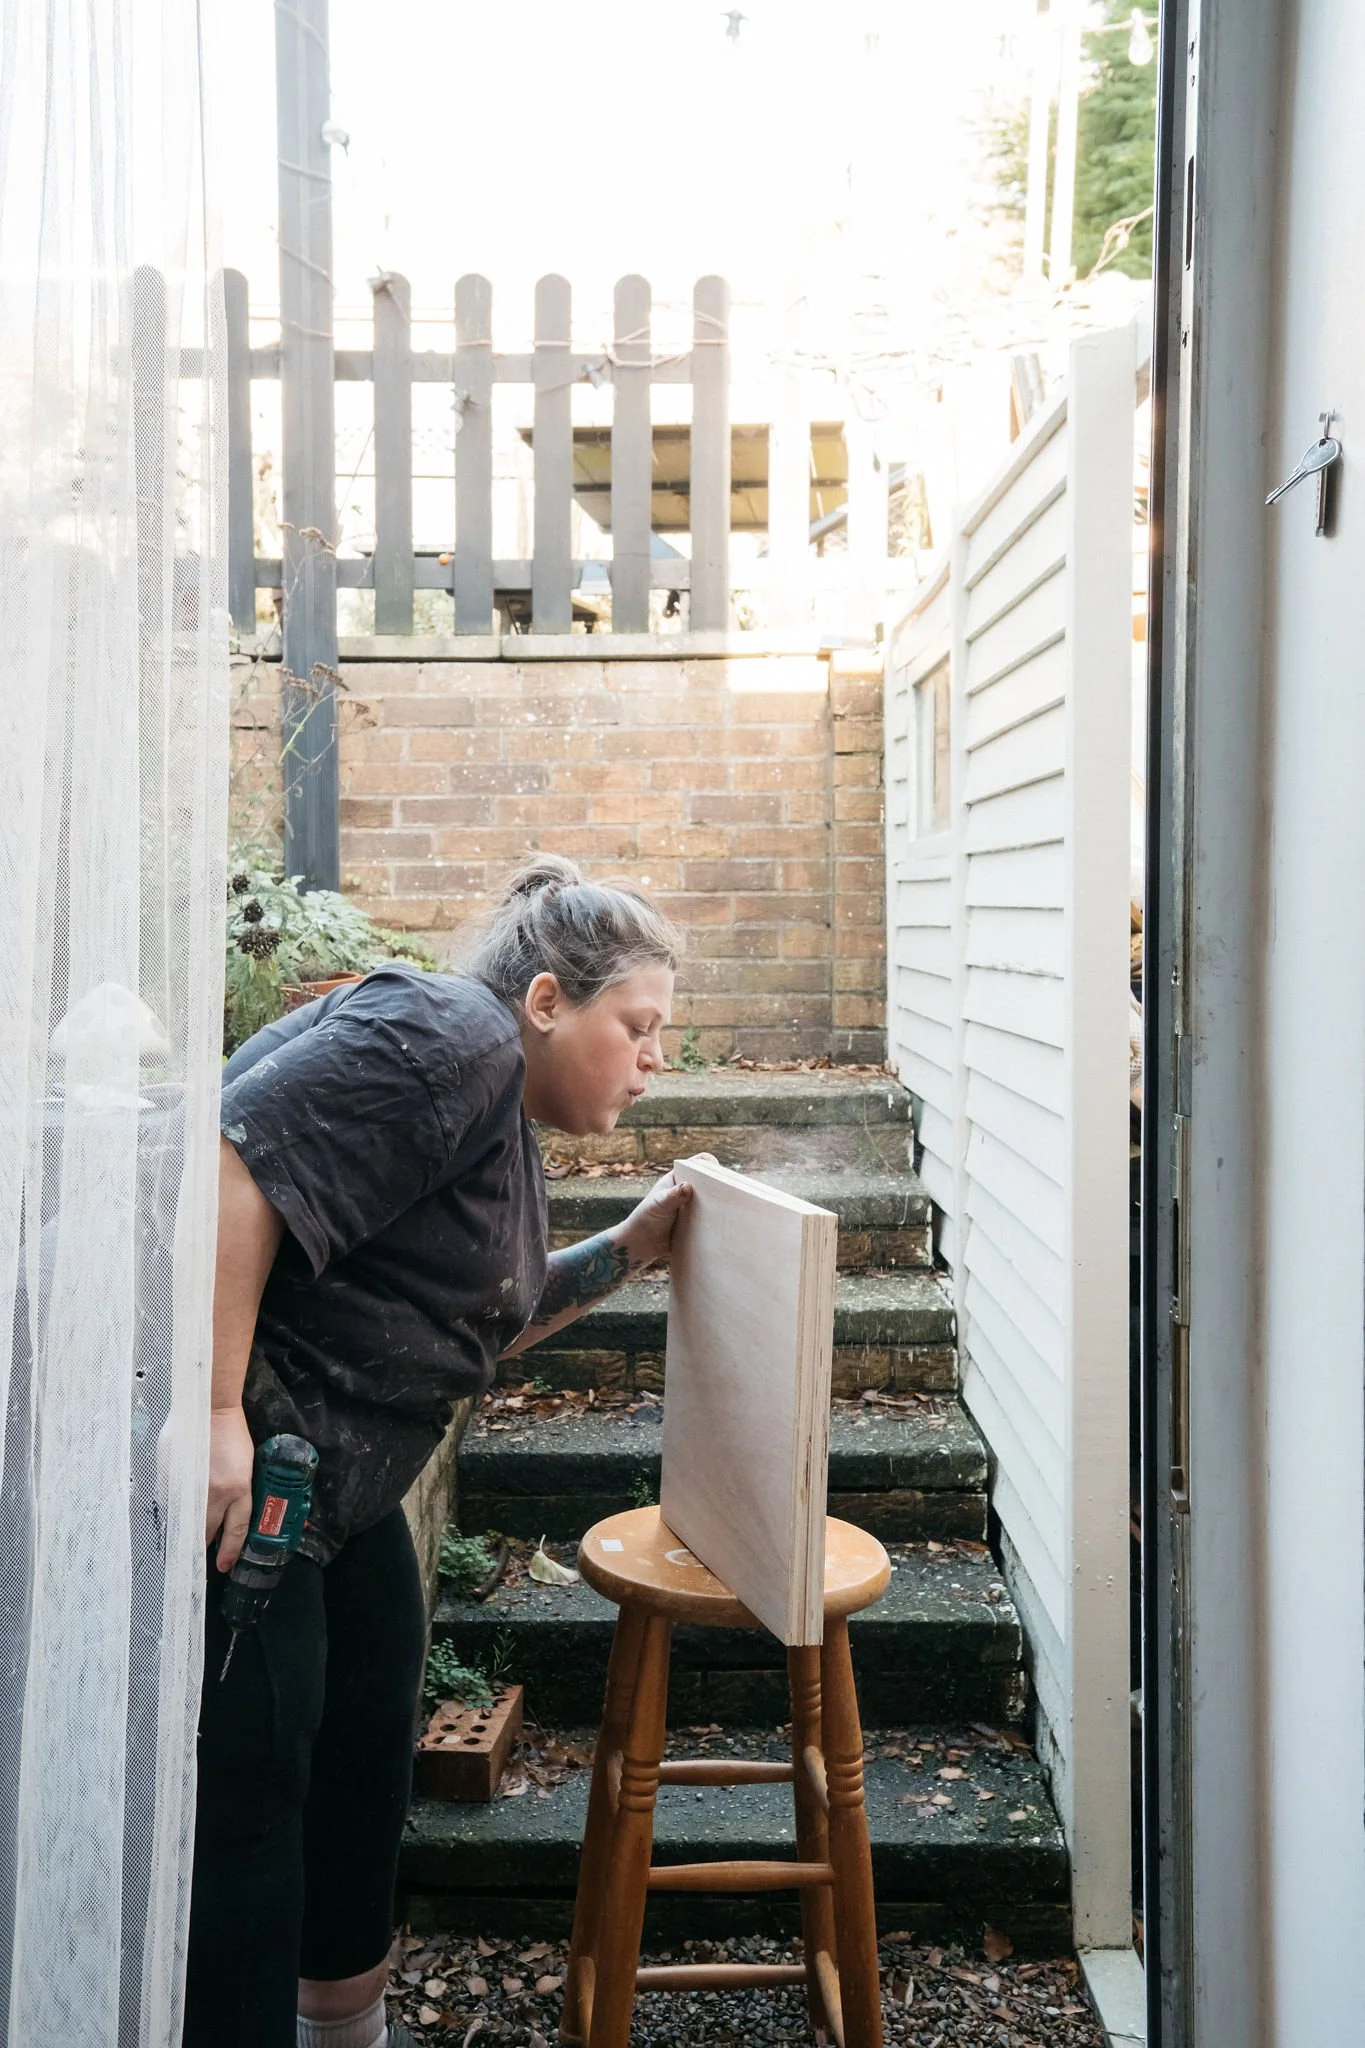
I worked pieces by piece starting with the two bottom bookshelves and then when they were solid I mounted the main desk piece on. I then used a sander to slightly round off any edges to bring a bit more of a premium/softer feel to it all. I also realised I would need to curve off the edge of the desktop nearest where you walk into the room as it needed some softness and not to jut into the room so much/be a sharp corner to bang myself on. I did that by drawing a wavy corner and using my jigsaw then sanding down heavily to curve off the corners.
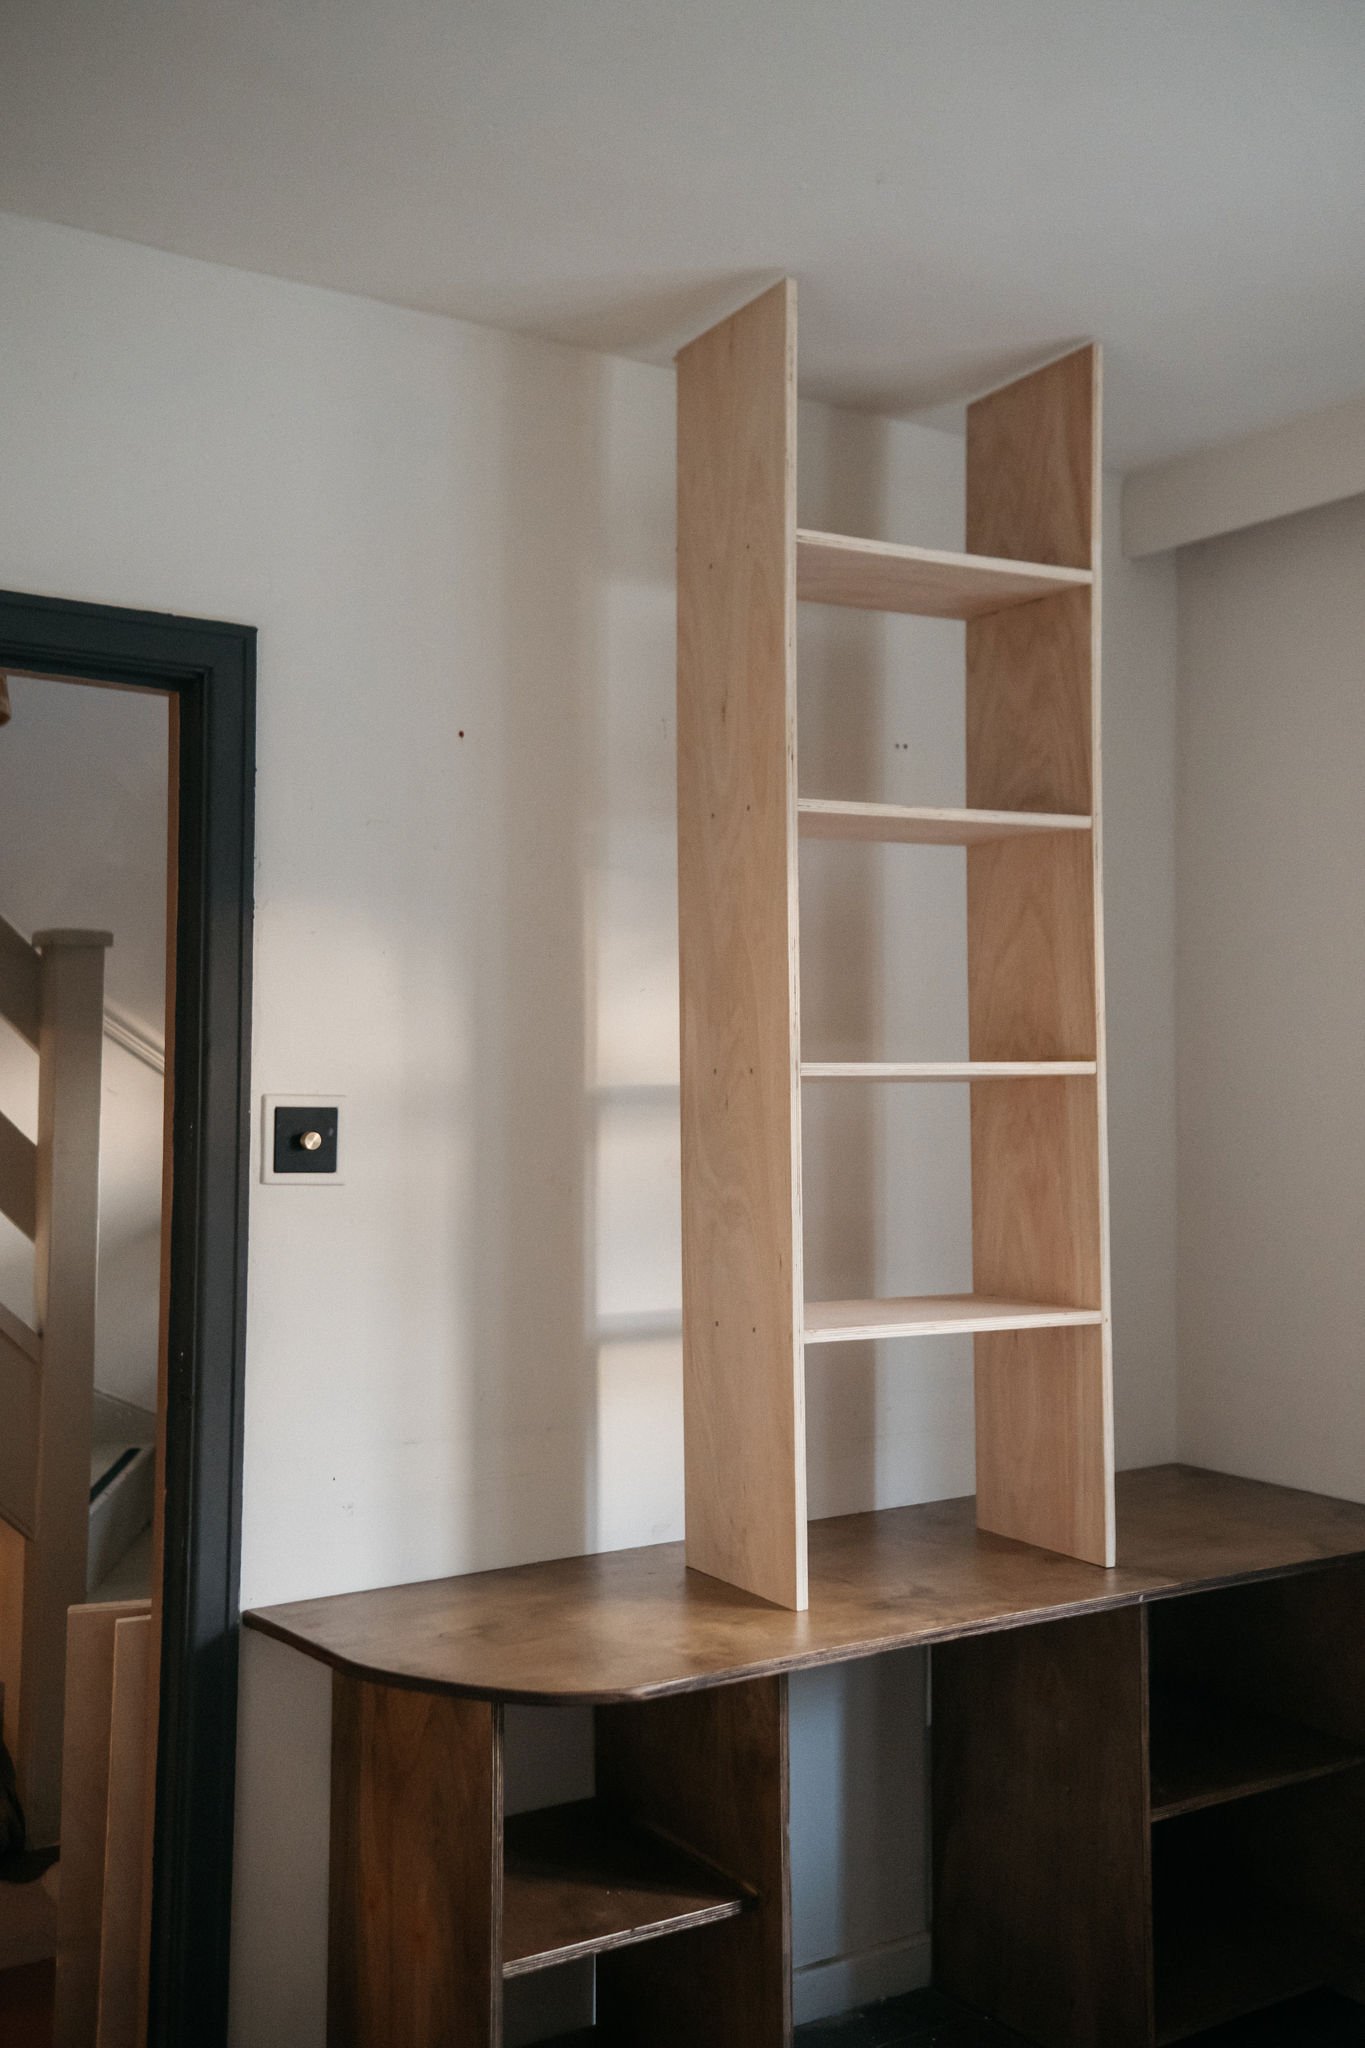
Once I got to the point that the desk top was on I screwed it into the bottom bookshelves I’d made and then I stained it before getting to work on the top bookshelves.
I made the top bookshelves less deep than the bottom ones as I wanted the desk top to have breathing space. Again - they were pretty easy to put together using the same method. After rounding off all the edges, I stained these outside before bringing in to mount on top of the desk - this is where I found out my wall was higher at one end! So I had to chop a bit off with my circular saw.
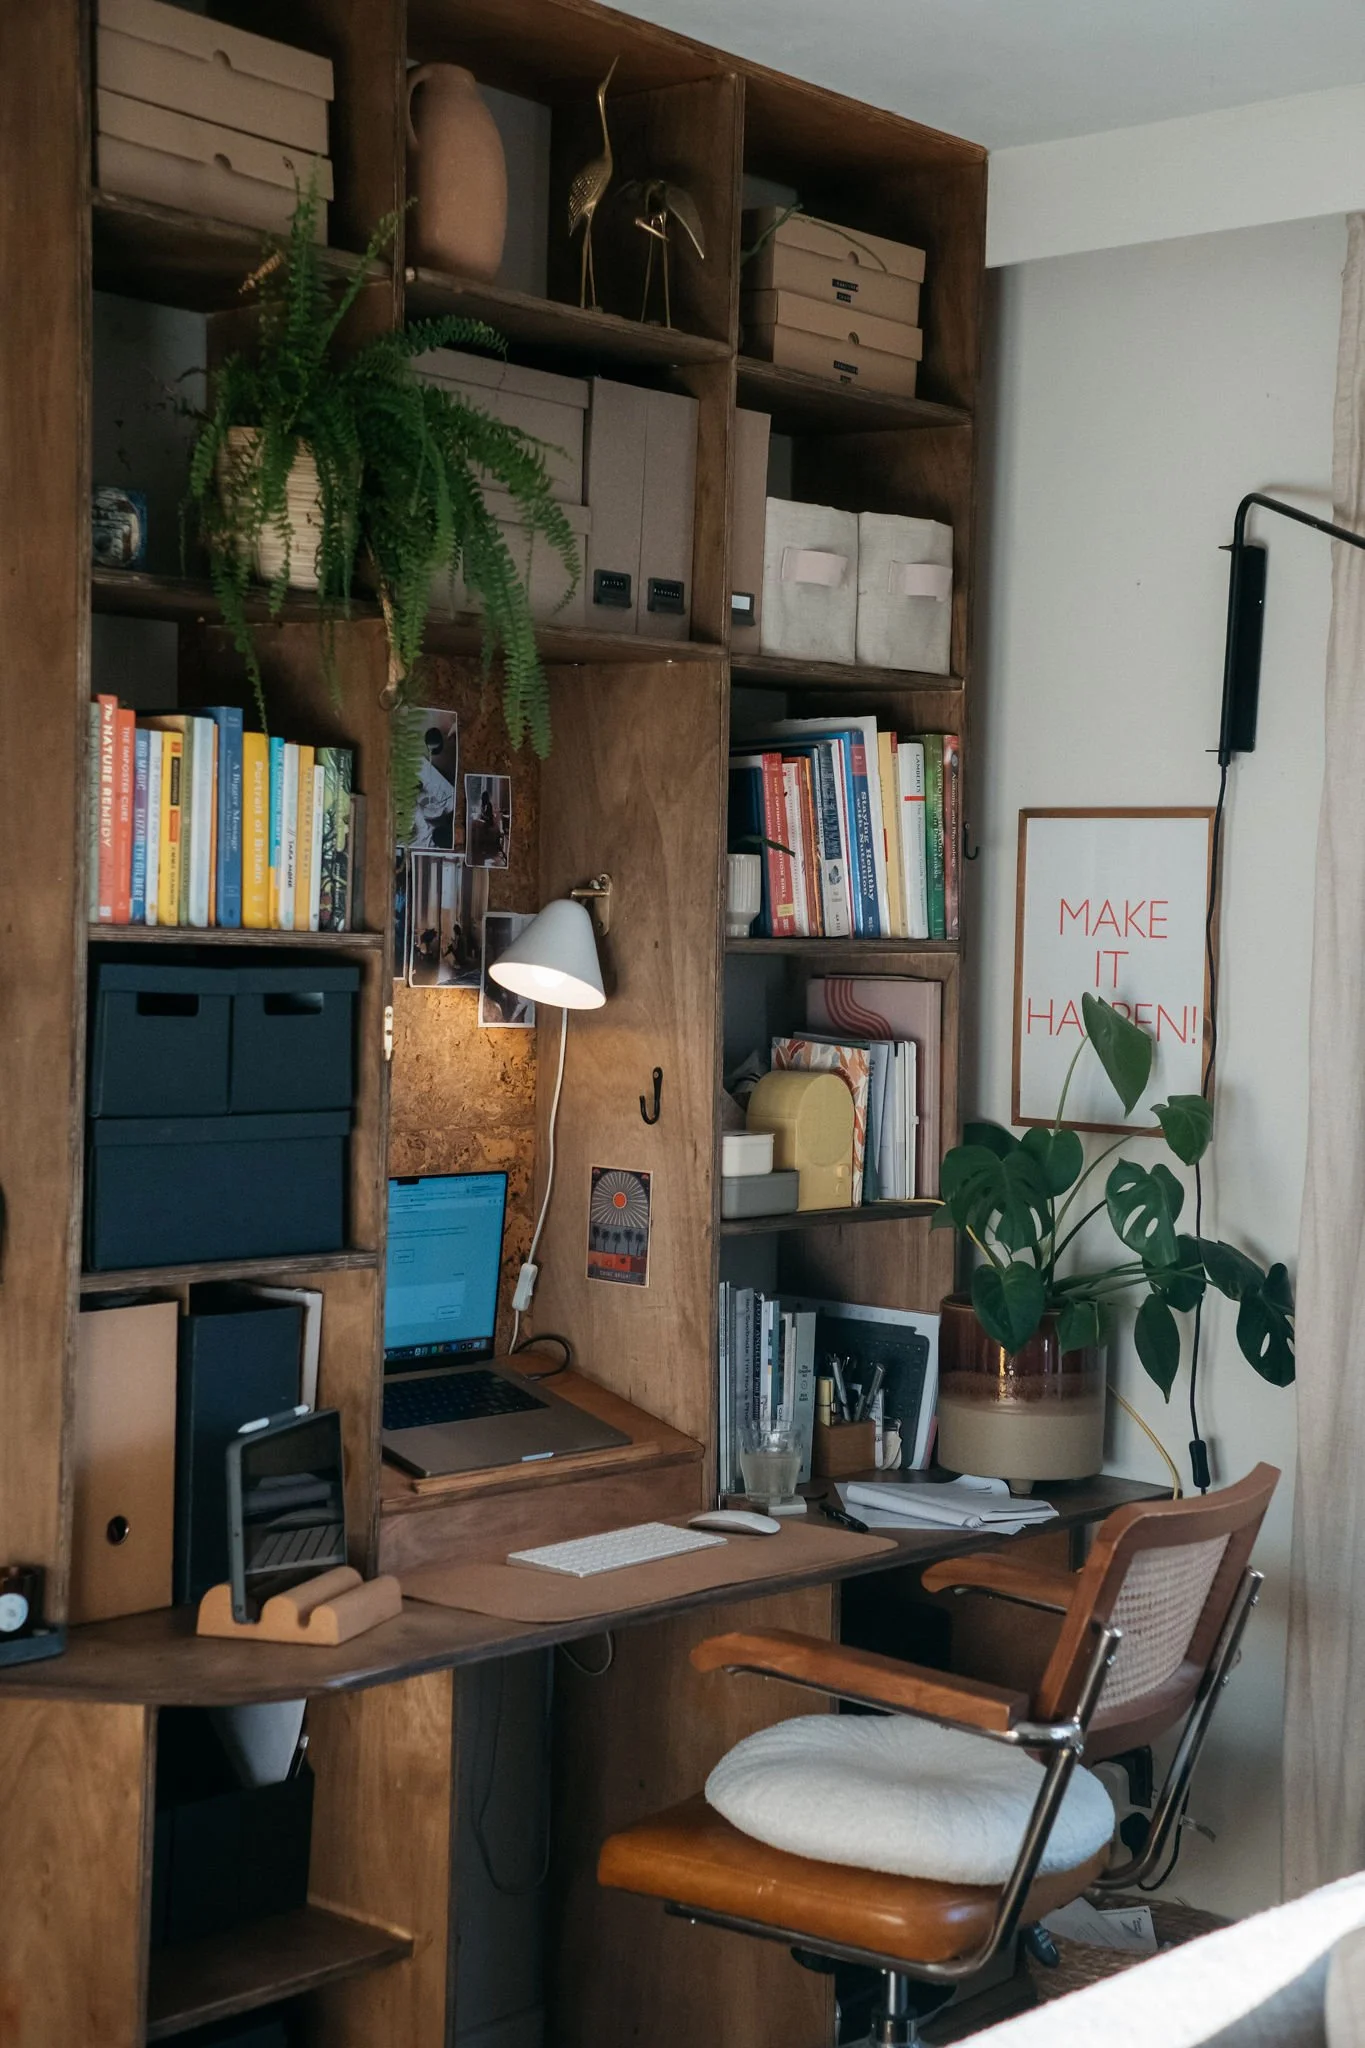
Once the two top vertical bookshelves were up I fitted the top plank (after rounding off and staining) and then using brackets I fitted two central shelves that joined the two sides together and created more space.
Once it was all together I then used offcuts to make a laptop raiser with a lift up ledge where all my cables and hard drives that I need access to live. The ledge has a little groove cut into it for the cables to come through to my laptop and then I used a bit of moulding to make sure the laptop doesn't fall off. The lift up ledge is just secured with a single screw on the top edges through the vertical bits of the bookshelf either side so that it lifts up and down.
Staining and finishing touches.
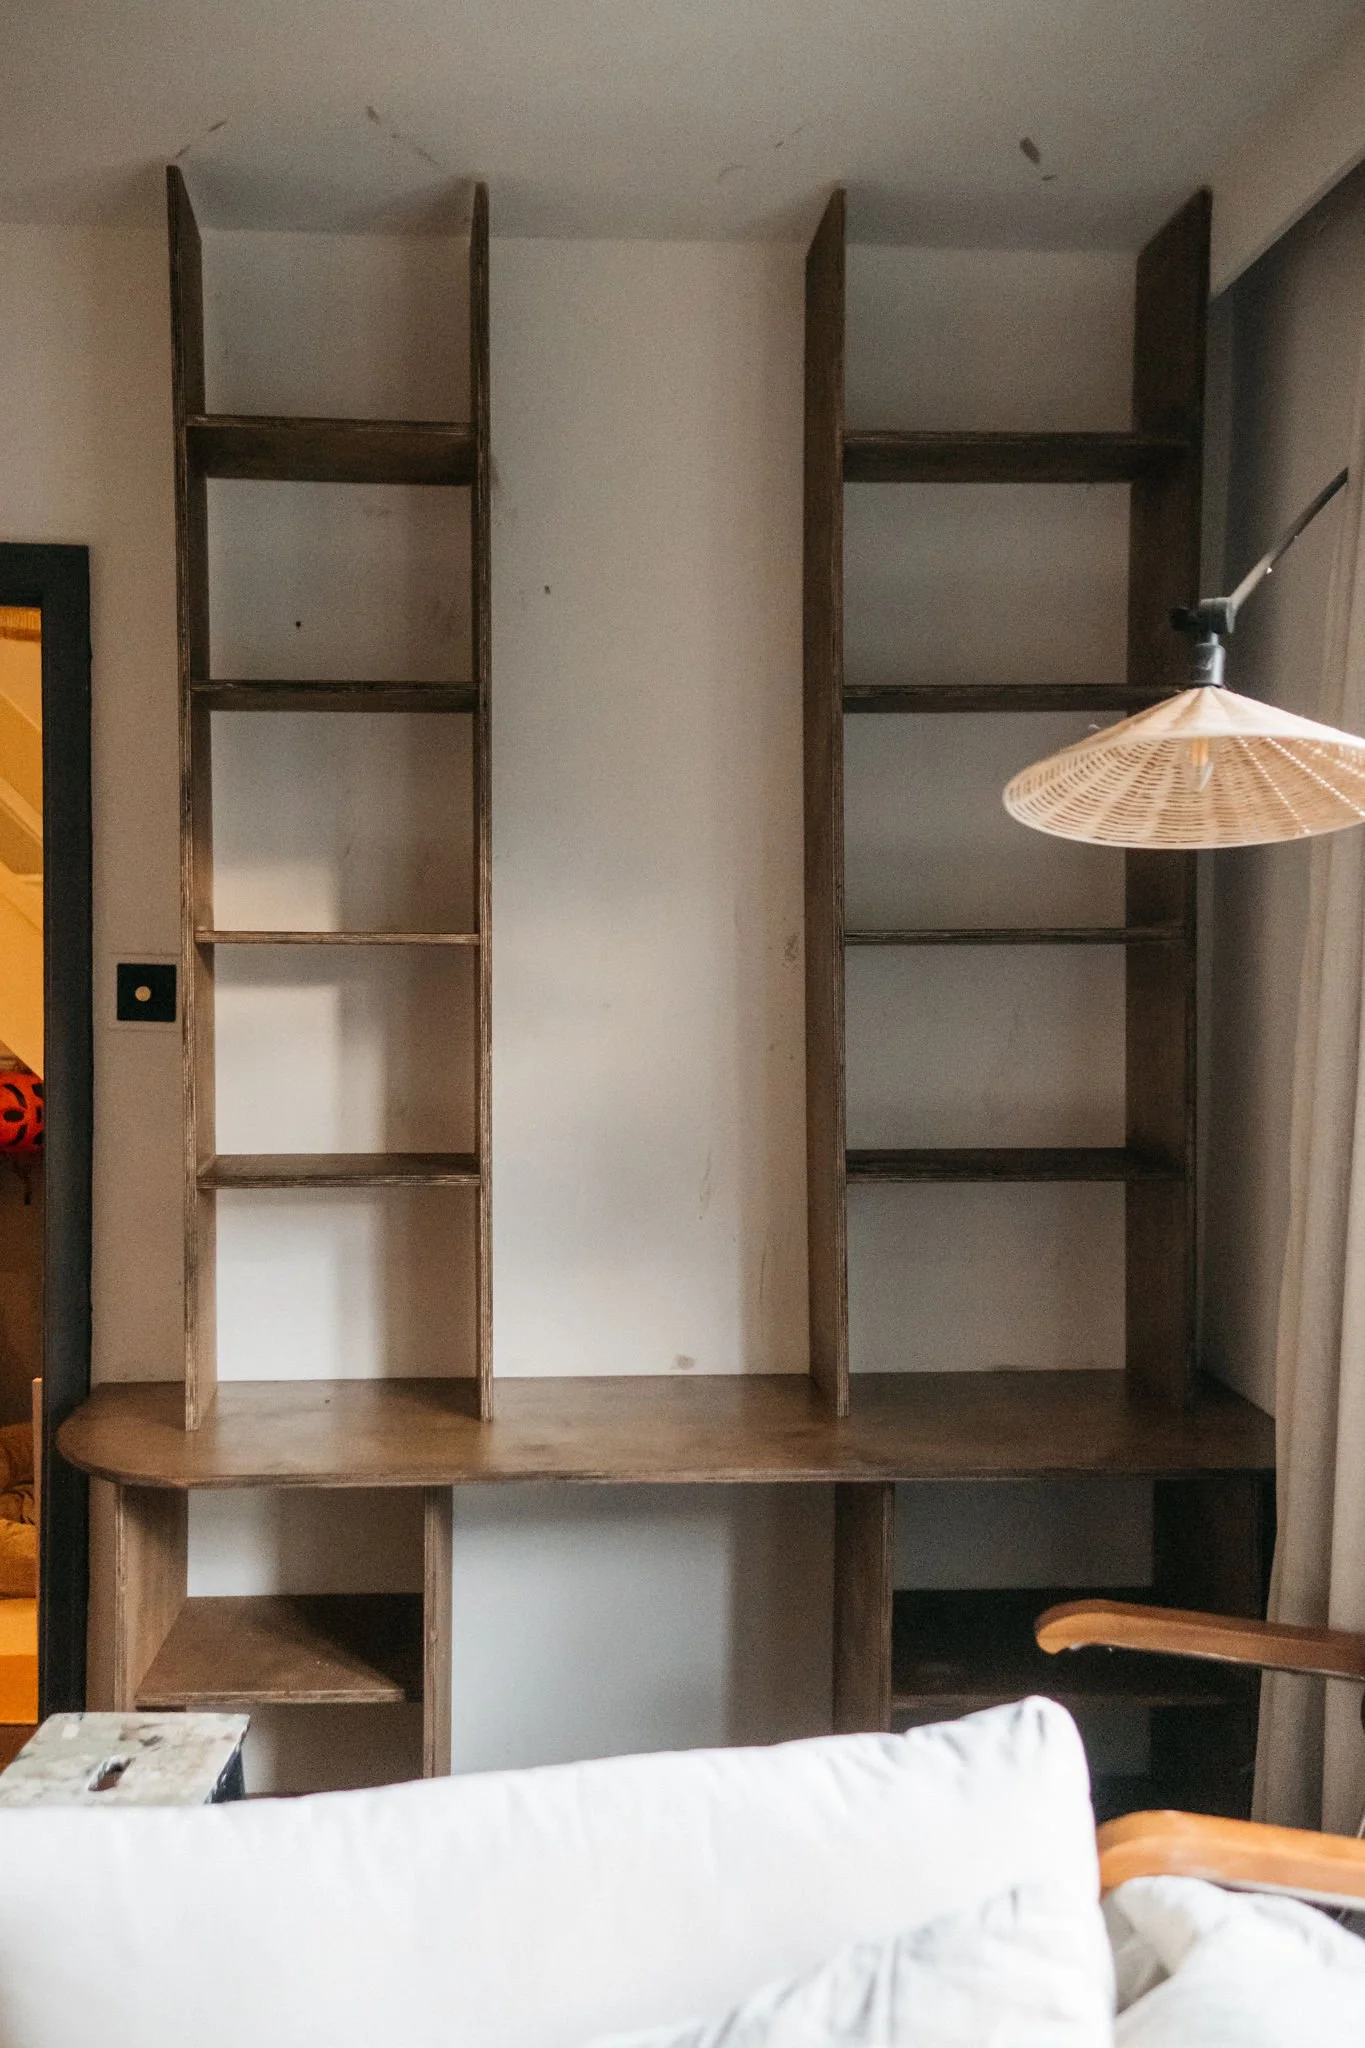
I knew I wanted this wood to be dark and matt to bring that retro 70’s vibe. My go to is always Osmo usually but because I was on a budget I had to look at different options and in the end I settled on Colron Danish Oil in Jacobean Dark Oak but just a word of warning - I ran out of the first tin which came out a beautiful dark colour but then every other tin I bought after that came out a completely different colour so in the end I had to use the wood dye with a clear oil on top. They did all have the same batch number on so it could be that they put the wrong oil in a batch so hopefully by now it’s been rectified (this was end of November).
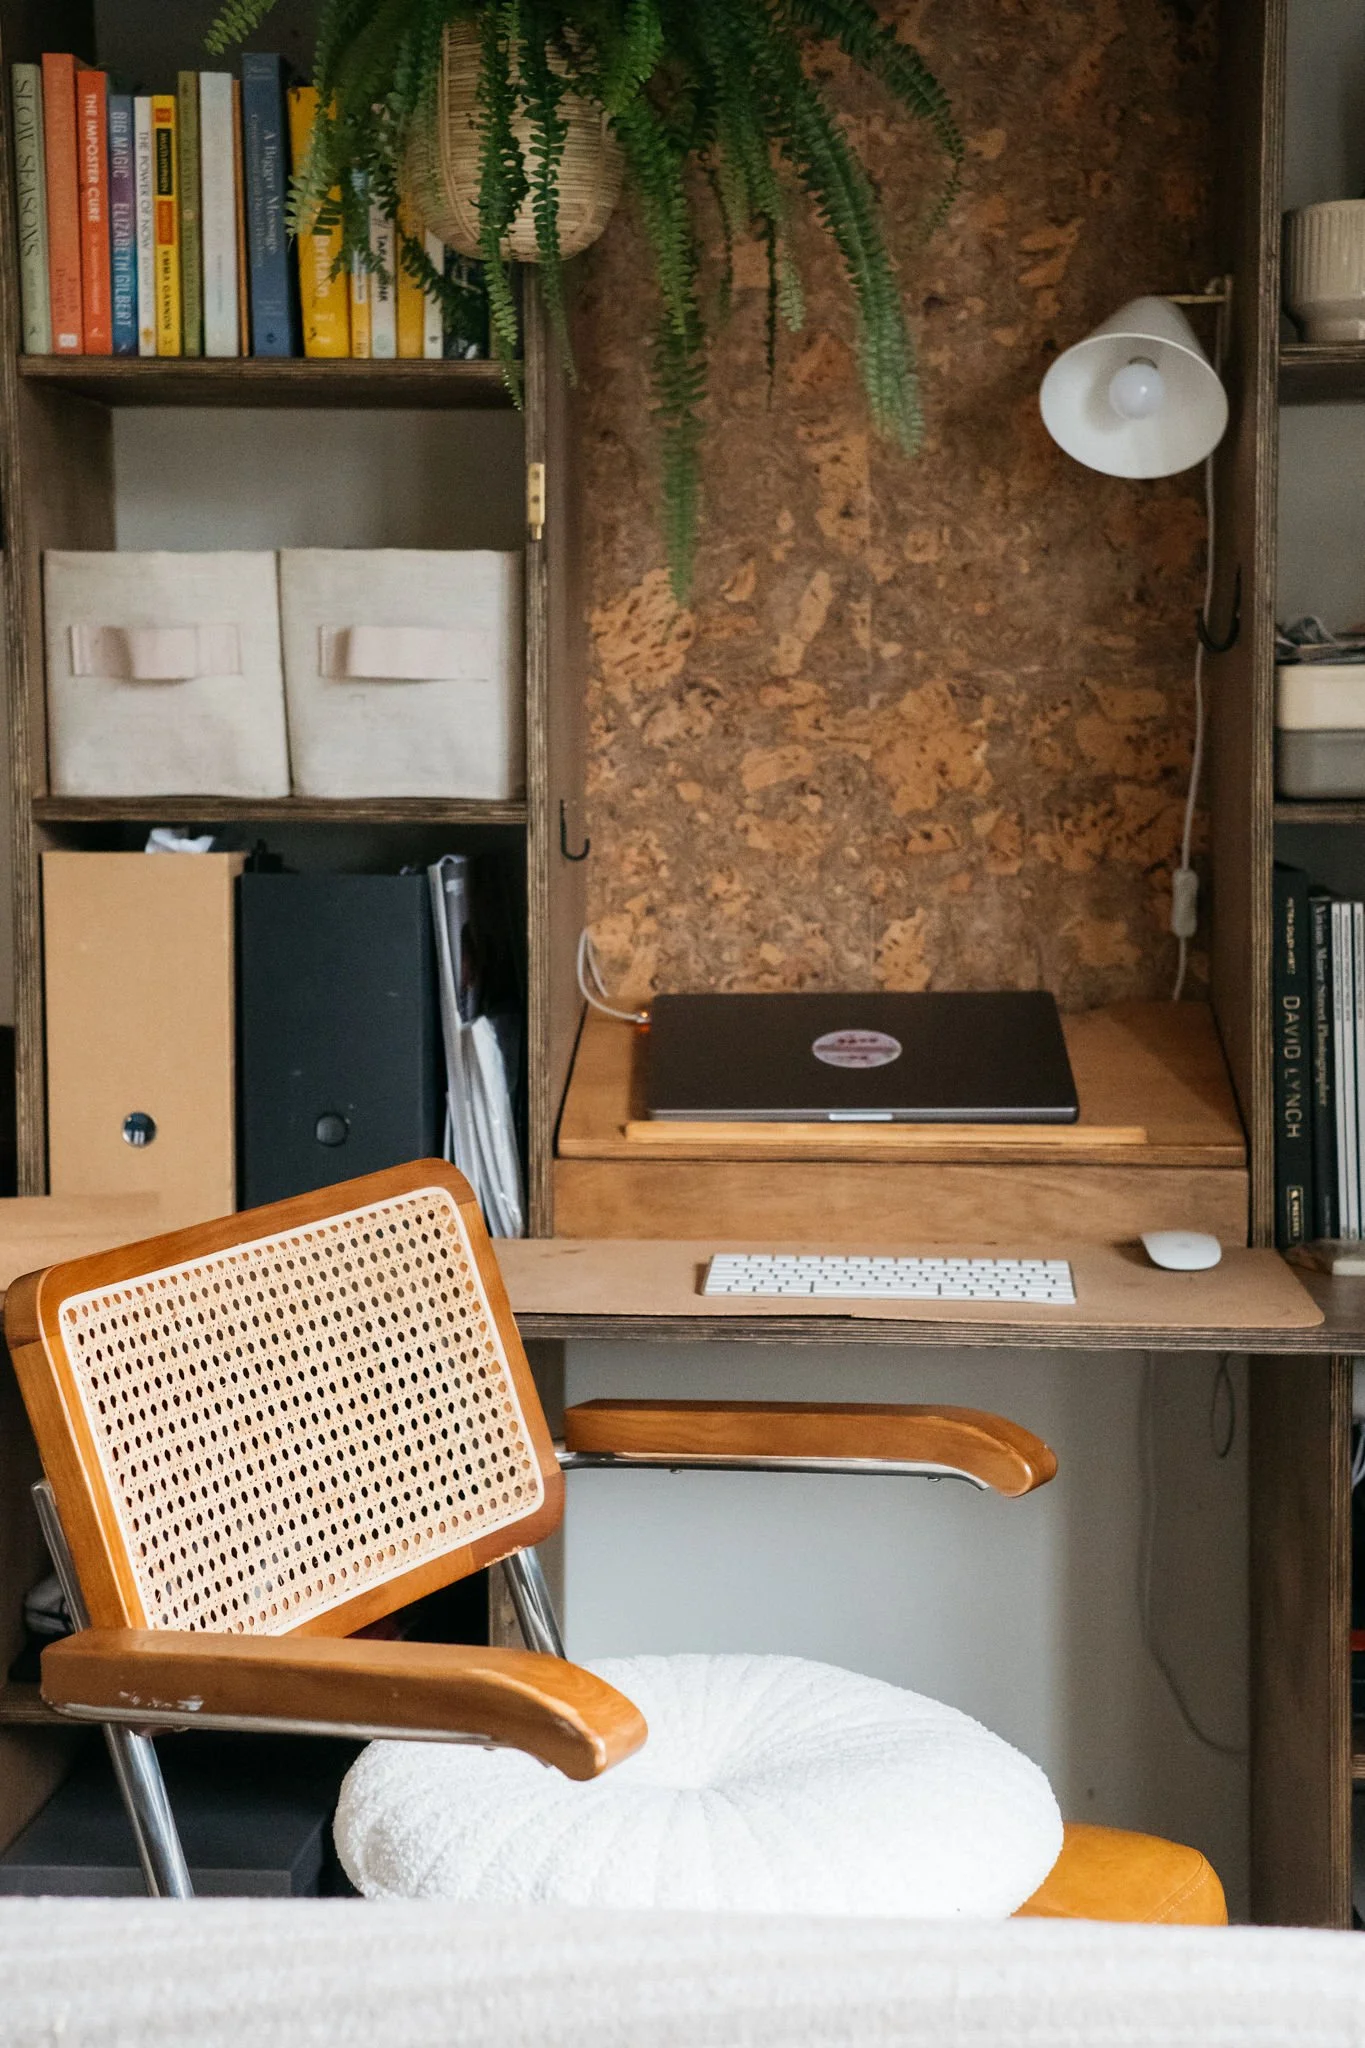
I then used a wide wood drill bit to create cable holes throughout the set up to hide any cables to my speaker/through to the storage under my laptop and to the printer etc. I then ordered some dark cork boards for the bit of wall behind my laptop which I fixed to wall with grab adhesive.
Life with the desk set up.
I absolutely love this set up, I would say it’s one of my favourite projects in the house because I feel so focused while I’m sat at my desk. It was so heartbreaking that I only had a few weeks with Monty and this set up - we both loved being close to each other during the day and I used to reach over for tummy scratches which he loved. But now Ollie is here I’m seeing different benefits because he likes to pop up over the back of the sofa and give me cuddles throughout the day.
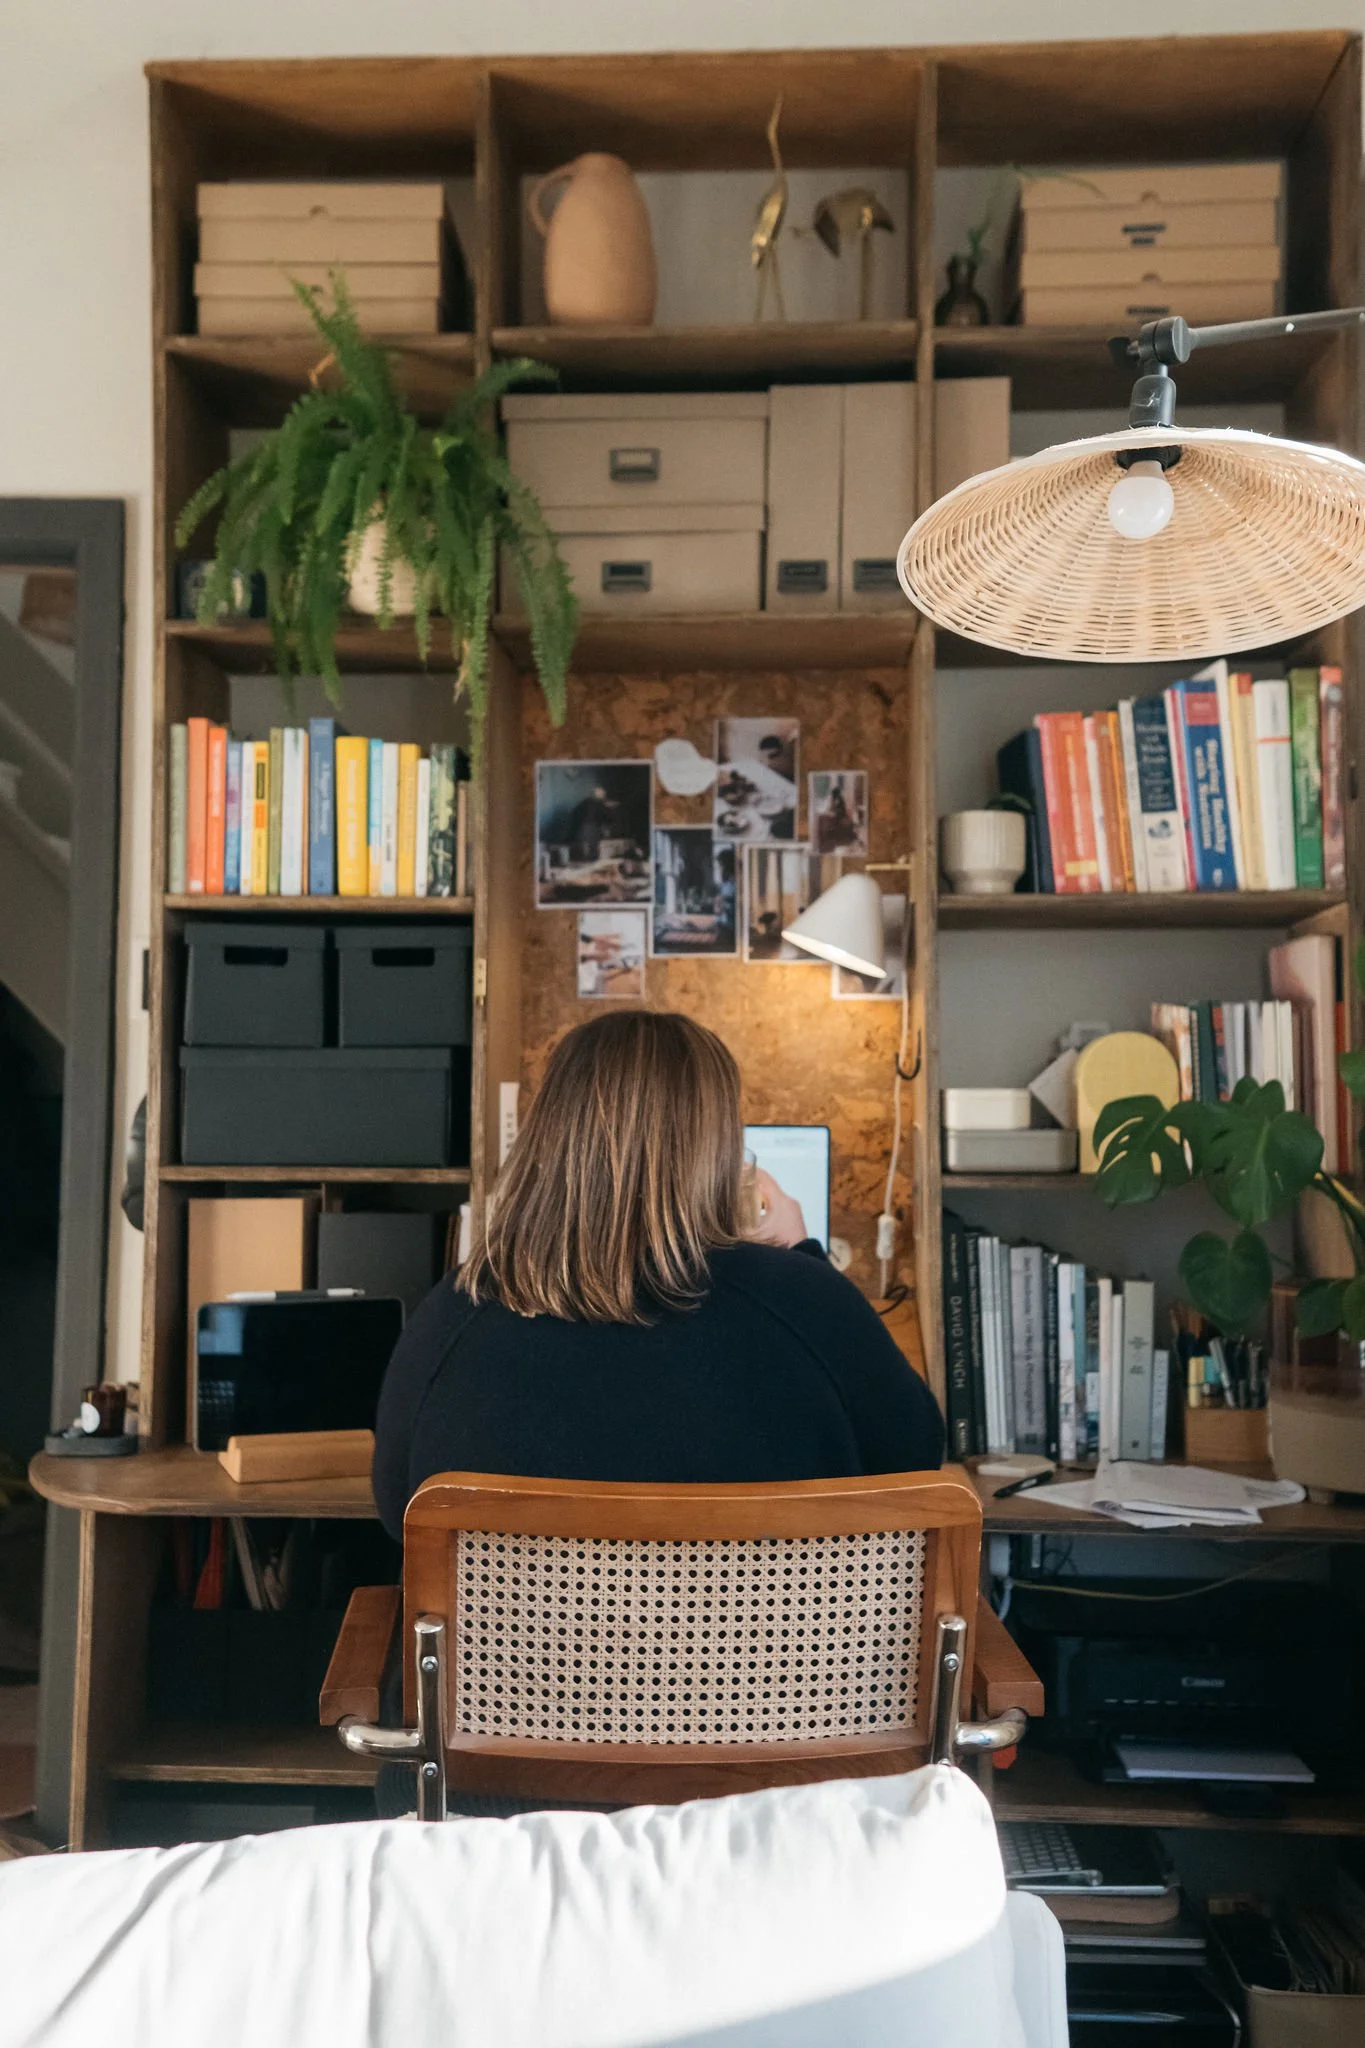
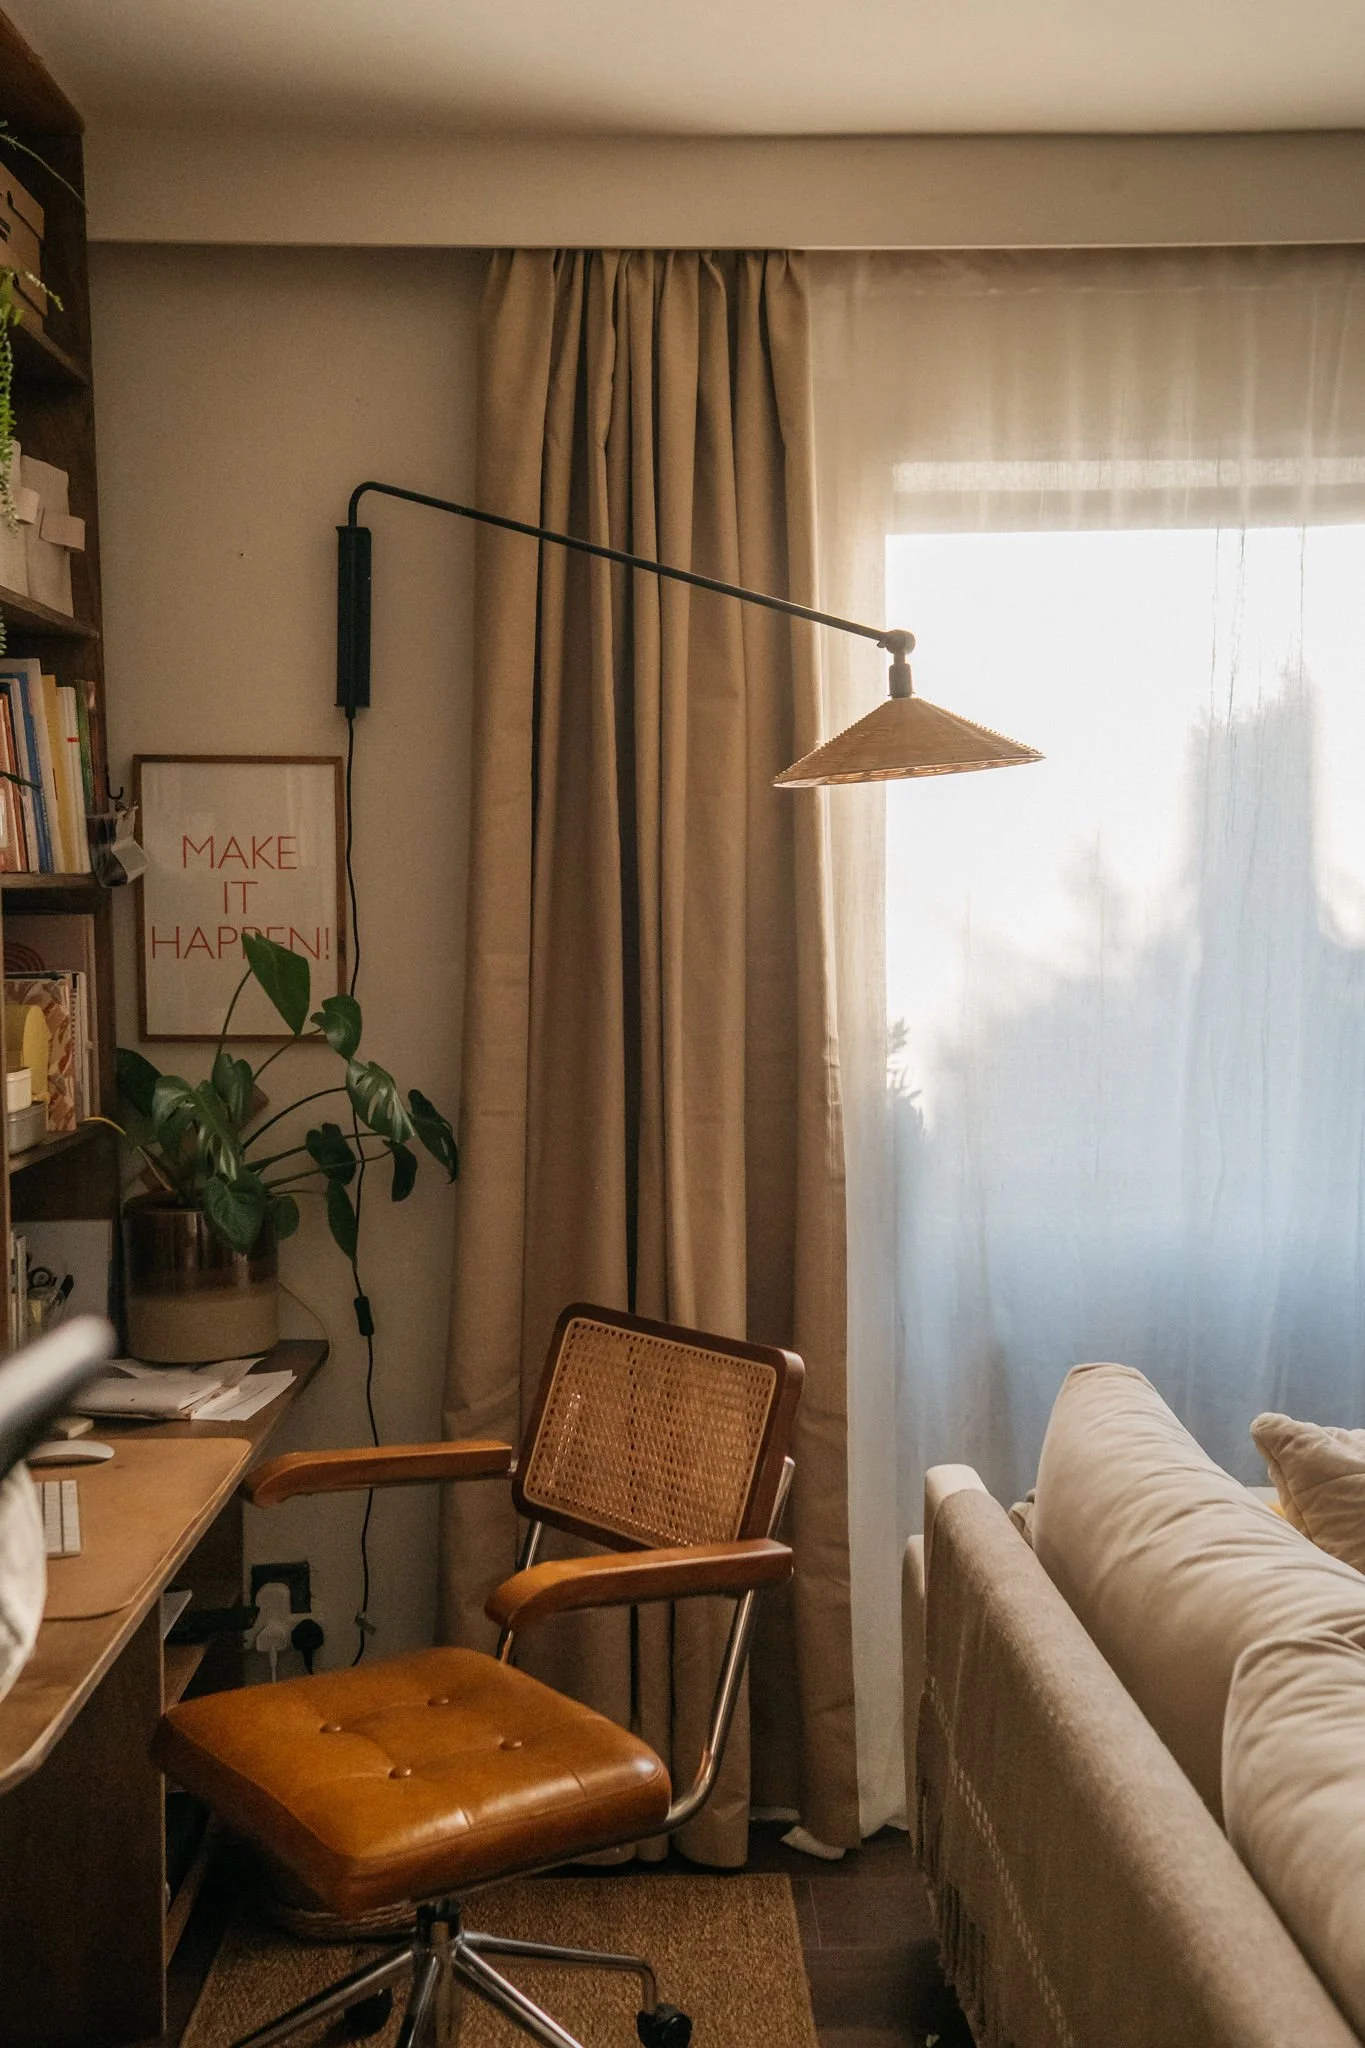
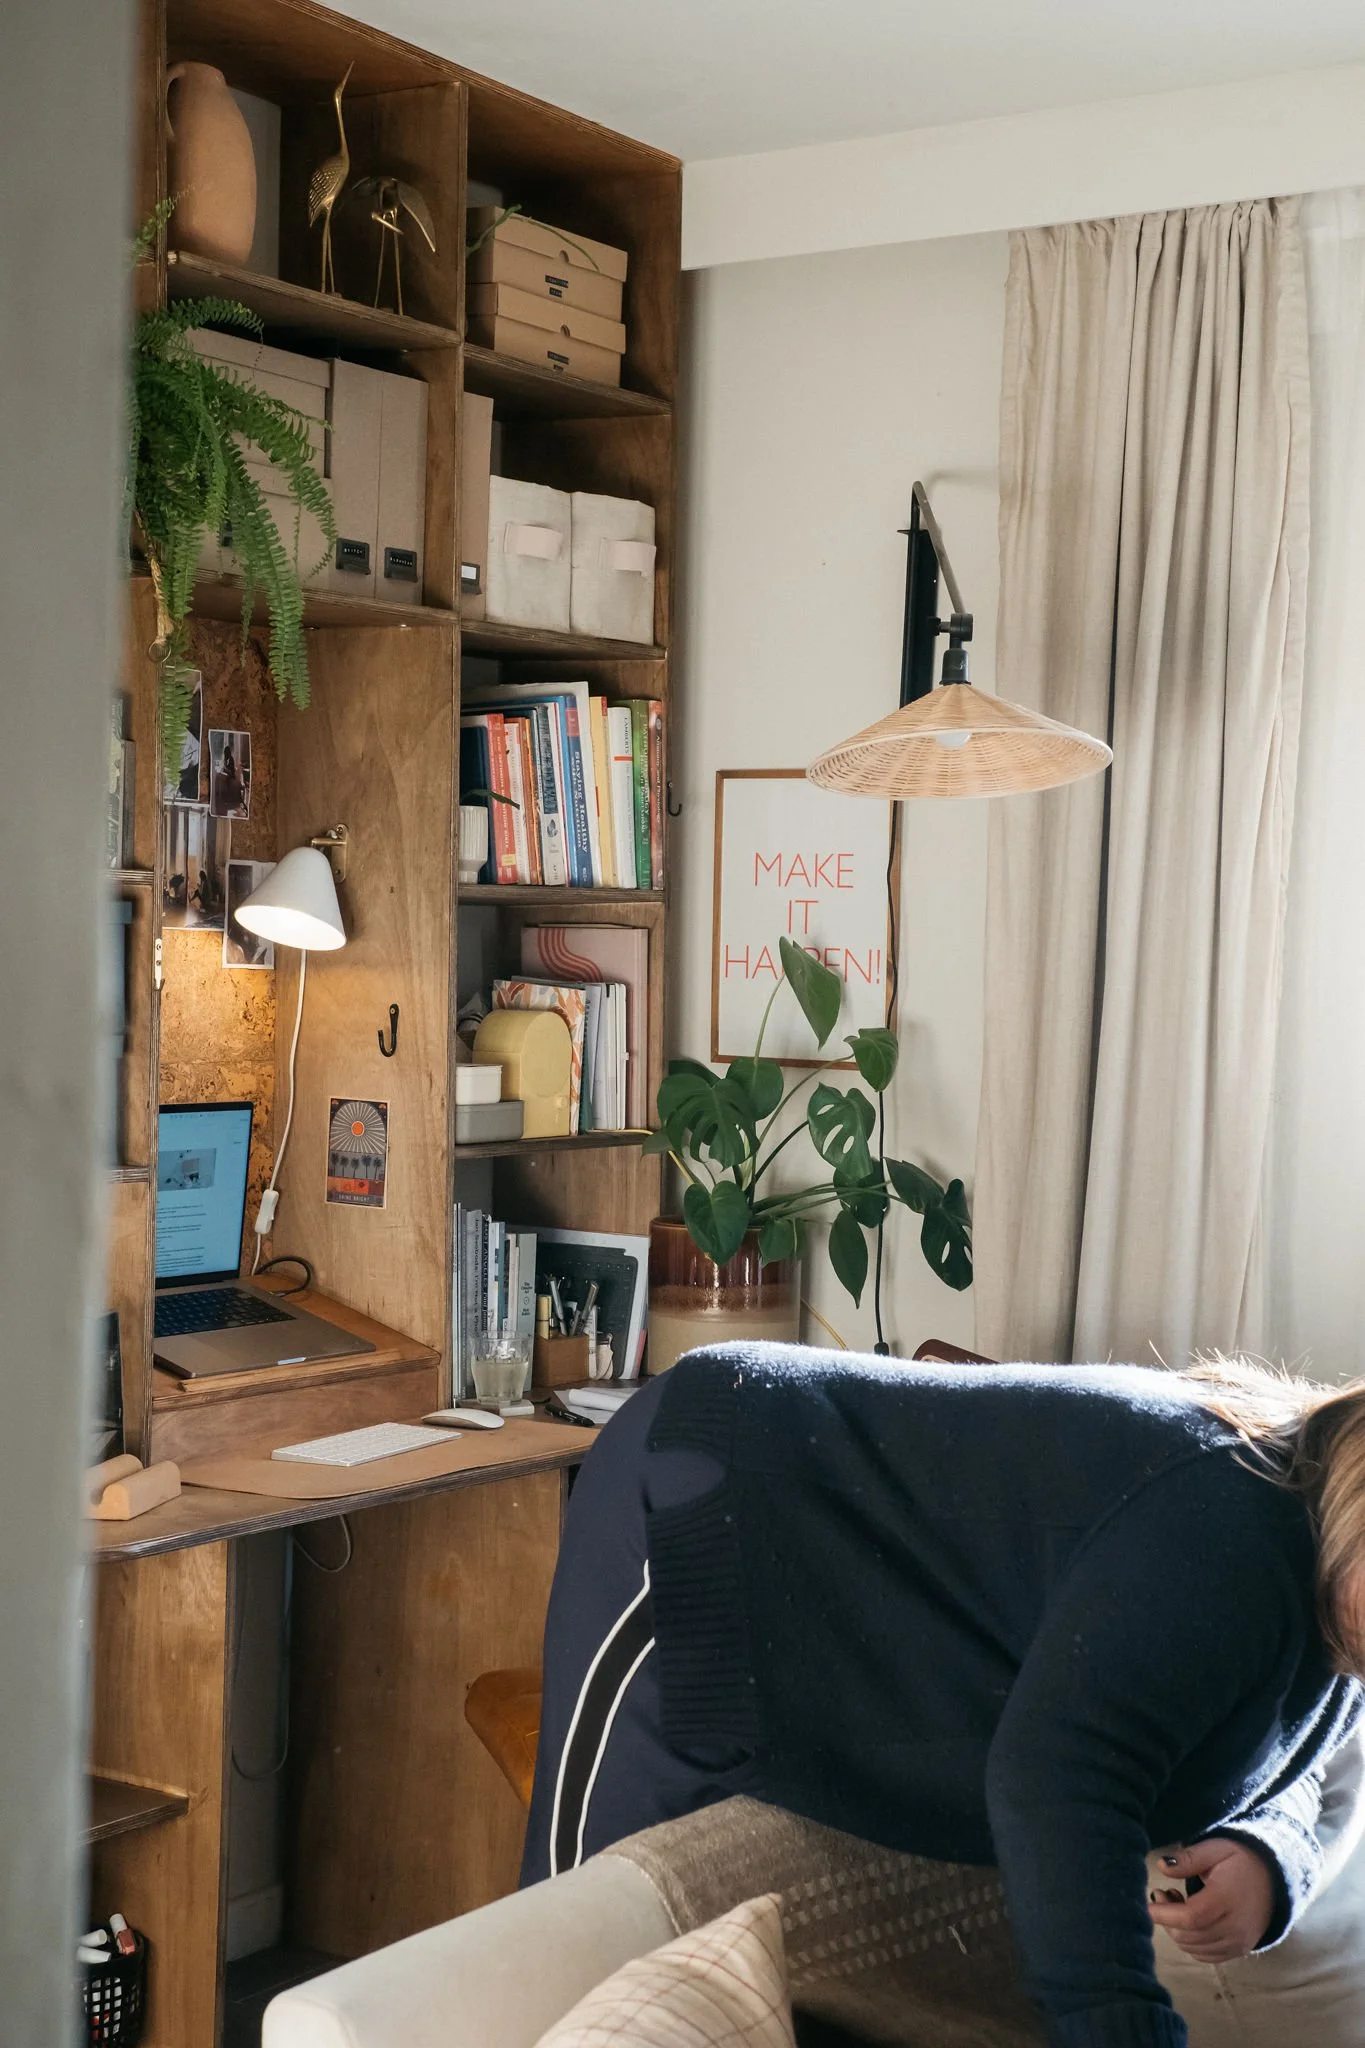
I love that my work area is condensed with all the space I need to stay organised and on top of paperwork and I have everything to hand for a focused day. I also love that I have my back to my living area so while my workspace is also in my living space I can really sepearate my time because I know when the desk light gos off and the laptop is shut I can relax into my space.
Also, working from home has been a joy - I’m more likely to socialise/make phonecalls in the evenings because I’ve been in my own company all day and my social battery isn’t flat and I feel so much more driven that when I’ve just been sat at my dining room table. It also means I am sitting correctly and not damaging my posture. And the best thing is the whole thing cost me under £100.
So, what do you think? I can’t wait to get to phase two to extend it out!


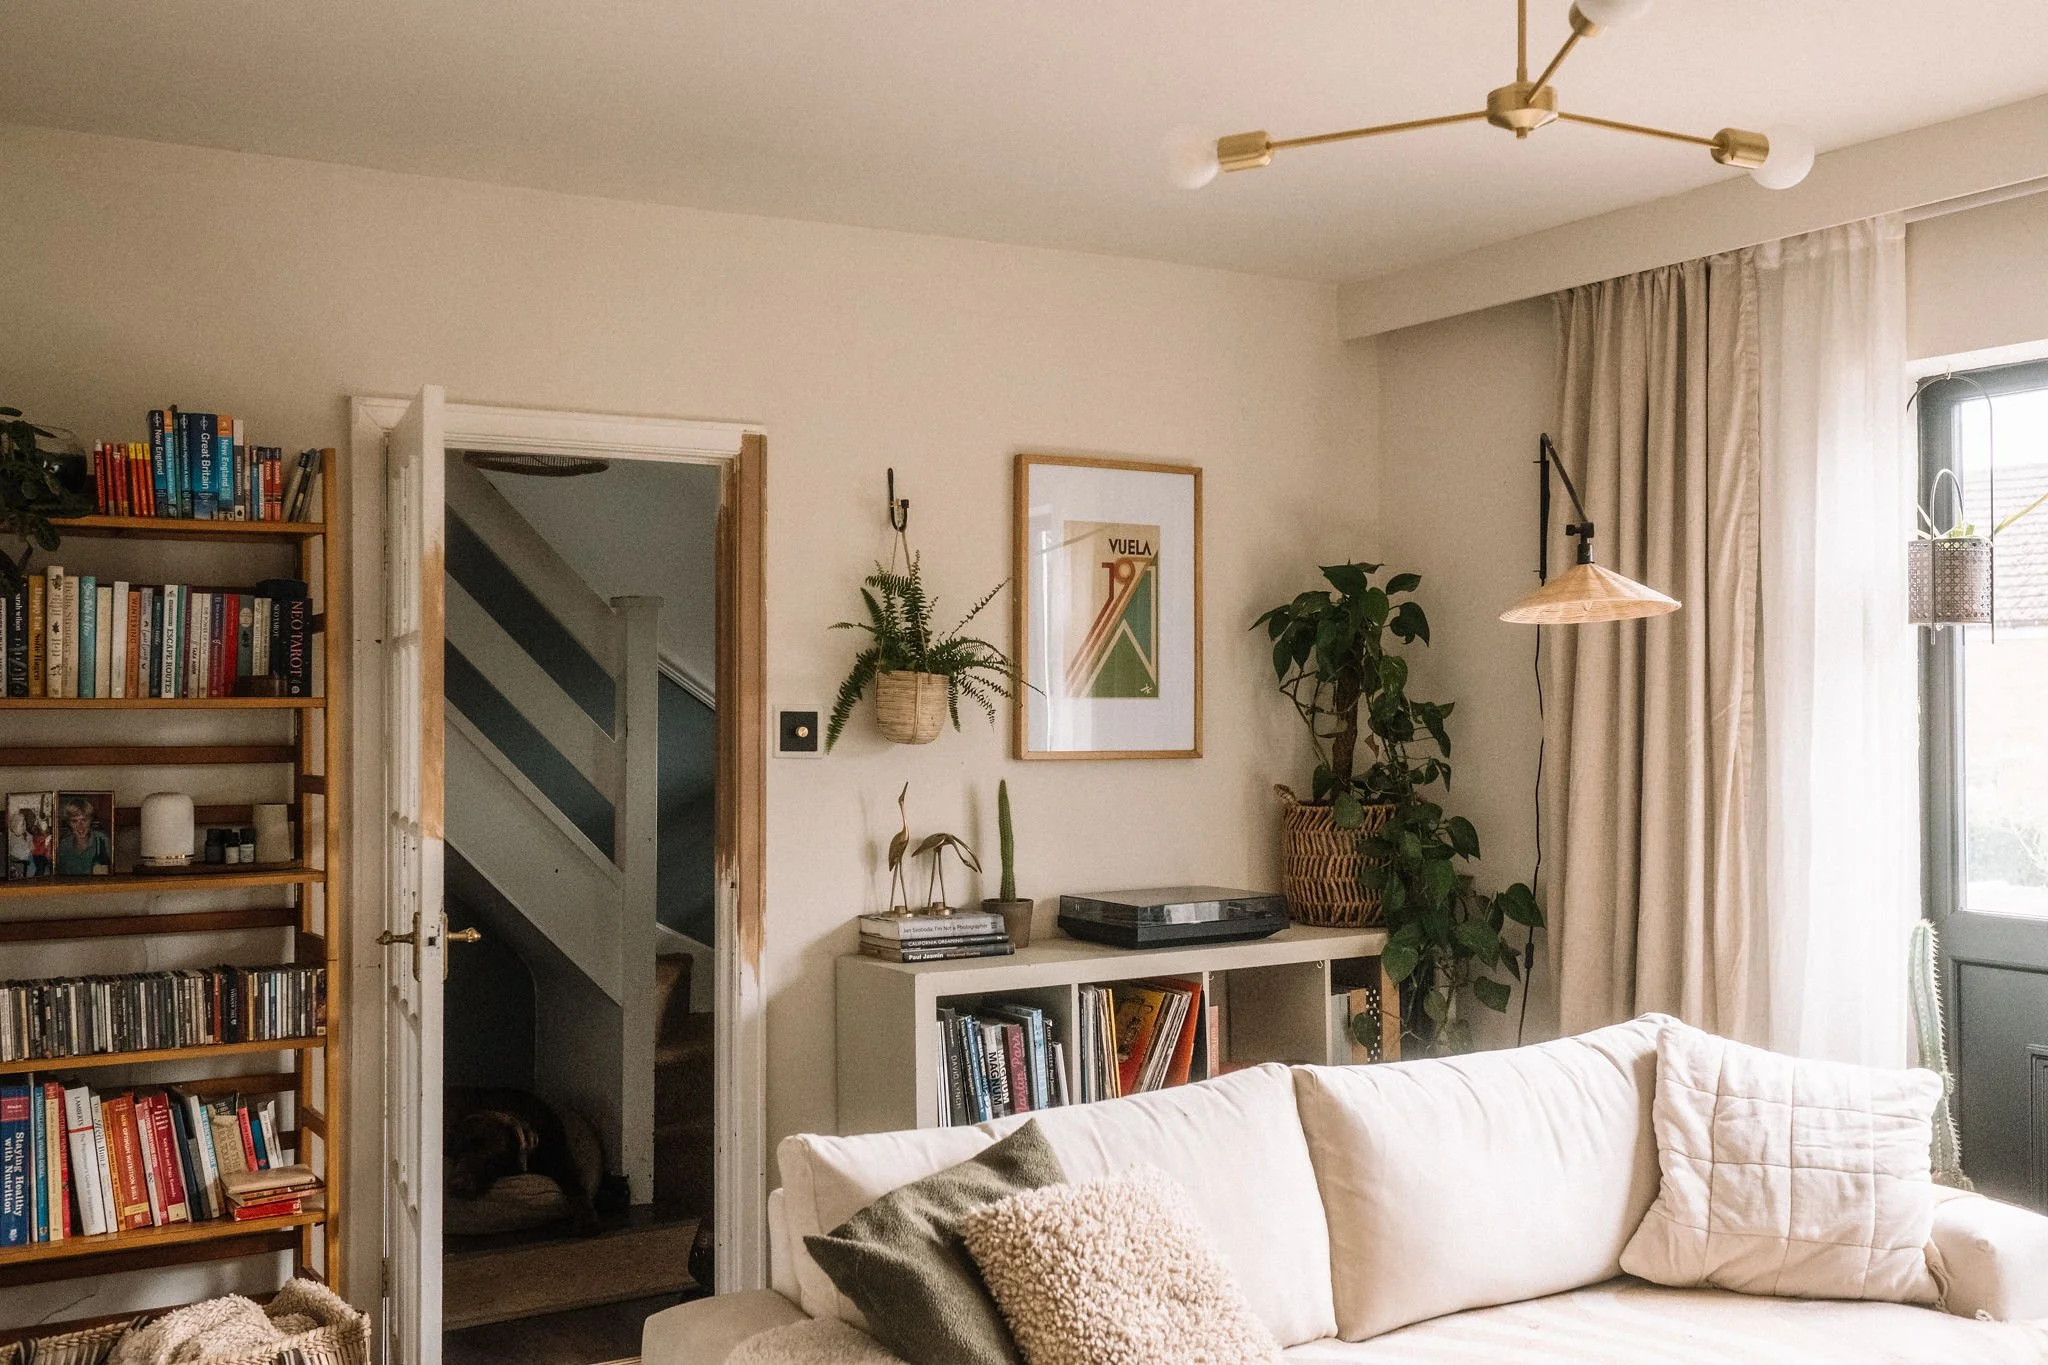
A floor to ceiling DIY dark wood shelving and desk fitted unit with a retro 70’s aesthetic.